Files and the library
Upload pictures, clips, sound, PDFs and whole folders to Fil's canvas, then search, filter, star, file and restore everything you make in the library.
Everything you upload and everything a model makes for you lands in your Library, one per workspace, the newest first. On a canvas, the files you add become nodes you can wire into runs: a photo as a reference, a PDF or a brief as notes, a folder as a working website.
Upload files to a canvas
- Open a canvas.
- Drag files from your computer onto it: they land where you let go. You can drop several at once.
- Each one shows "Uploading" with its size where its node will appear, then becomes a node. Nothing lands on top of another node.
Other ways in:
- The upload button at the right of the toolbar ("Upload media, PDF or text", ⌘U), or right-click empty canvas and choose Upload files. Both open your computer's file picker.
- Upload files at the top of the left panel's Assets tab, which also says how large each file can be on your plan.
- Paste with ⌘V: files and pictures from your clipboard come in the same way. A web address brings in what it points to (a picture, a PDF, a page), and text becomes a Prompt or a document (see Prompts, documents and skills).
| You add | It becomes |
|---|---|
| A picture (PNG, JPEG, WebP, GIF) | A Reference, at its own shape |
| An SVG | A Reference, kept as code with a PNG beside it |
| A clip (MP4, WebM) | A Reference that plays |
| A sound (WAV, MP3, M4A, AAC, OGG, FLAC) | A Reference with its waveform |
| A 3D model (GLB) | A Reference you can turn |
| A PDF | A Document showing its first page |
| Text, Markdown, CSV, JSON, HTML, YAML | A Document |
| A folder | A website or a React app (below) |
A Reference node shows the file and feeds it to the nodes you wire it into: a look for a picture, a start frame for a video, a source for a 3D model (see Connect nodes). Its foot says "Uploaded" and its size. Every file you add is also in your Library.
Drop a folder: React apps and websites
Drag a whole folder from your computer onto a canvas and Fil reads what it is:
- A React project (a package.json with React, its code in
src/) becomes a React app node that runs on the canvas. Its npm packages load from esm.sh, and the files inpublic/andsrc/it uses are hosted with it. - A folder with an index.html becomes a Simple HTML page node that runs as it is, its pictures, styles and scripts hosted with it.
- A project that needs building uses its built folder (dist, build or out) if it has one. If not, the canvas says so: "… needs building before it runs: build it, then drop its build folder (dist)." Vue, Svelte and Next.js projects need building first: only React runs as it is.
- A folder with no website in it adds its pictures, clips, sounds, models and documents as if you'd dropped them, up to 40 at a time.
Only the files the site uses are uploaded. Never node_modules, lockfiles, hidden files such as .env, keys and certificates, or editor files. The message says what was added and what was left out ("Added tea-timer as a React app. Left out a file it doesn't use (1 KB): package.json."), with Add the rest when the site might want more. If the page later asks for a file that was left out, the canvas offers to add it. A site can host up to 1,500 files, its page up to 2 MB, and the whole site within your plan's size below. Folders arrive by dragging only: the file picker takes files.
From there a React app or a website is a page like any other: open it full size, change it with Edit with agent, or publish it (see Websites in Fil).
File size limits by plan
| Plan | Each file | A dropped site |
|---|---|---|
| Free | 1 MB | 2 MB |
| Starter | 10 MB | 20 MB |
| Pro | 50 MB | 50 MB |
| Max | 100 MB | 100 MB |
A file over the limit isn't added, and the canvas says why: "… is 3.4 MB: Free uploads files up to 1 MB. Starter takes files up to 10 MB." On a paid plan: "… files can be up to 50 MB." On a canvas shared with you, your own plan's limit applies to what you upload.
Files also count toward your storage: 1 GB on Free, 20 GB on Starter, 50 GB a seat on Pro and 200 GB a seat on Max. When it's full, uploads stop and paid runs wait until you delete files in the Trash forever or, on a paid plan, have credits for the extra (3 credits a GB a month). The Storage meter in the Library opens the page that lists what takes the room.
Find files in the Library
- Click Library in the sidebar (the number beside it is how many files you have), press L outside a text field or a canvas, or pick Library in ⌘K.
- The newest files come first, each at its own shape. A file shows once, as it is now: earlier versions of a page or a picture are in its version history.
- Click a tile. A picture, clip or 3D model opens in its view (Image, Video or 3D) with its details on the right. A page, a sound or a PDF opens full size.
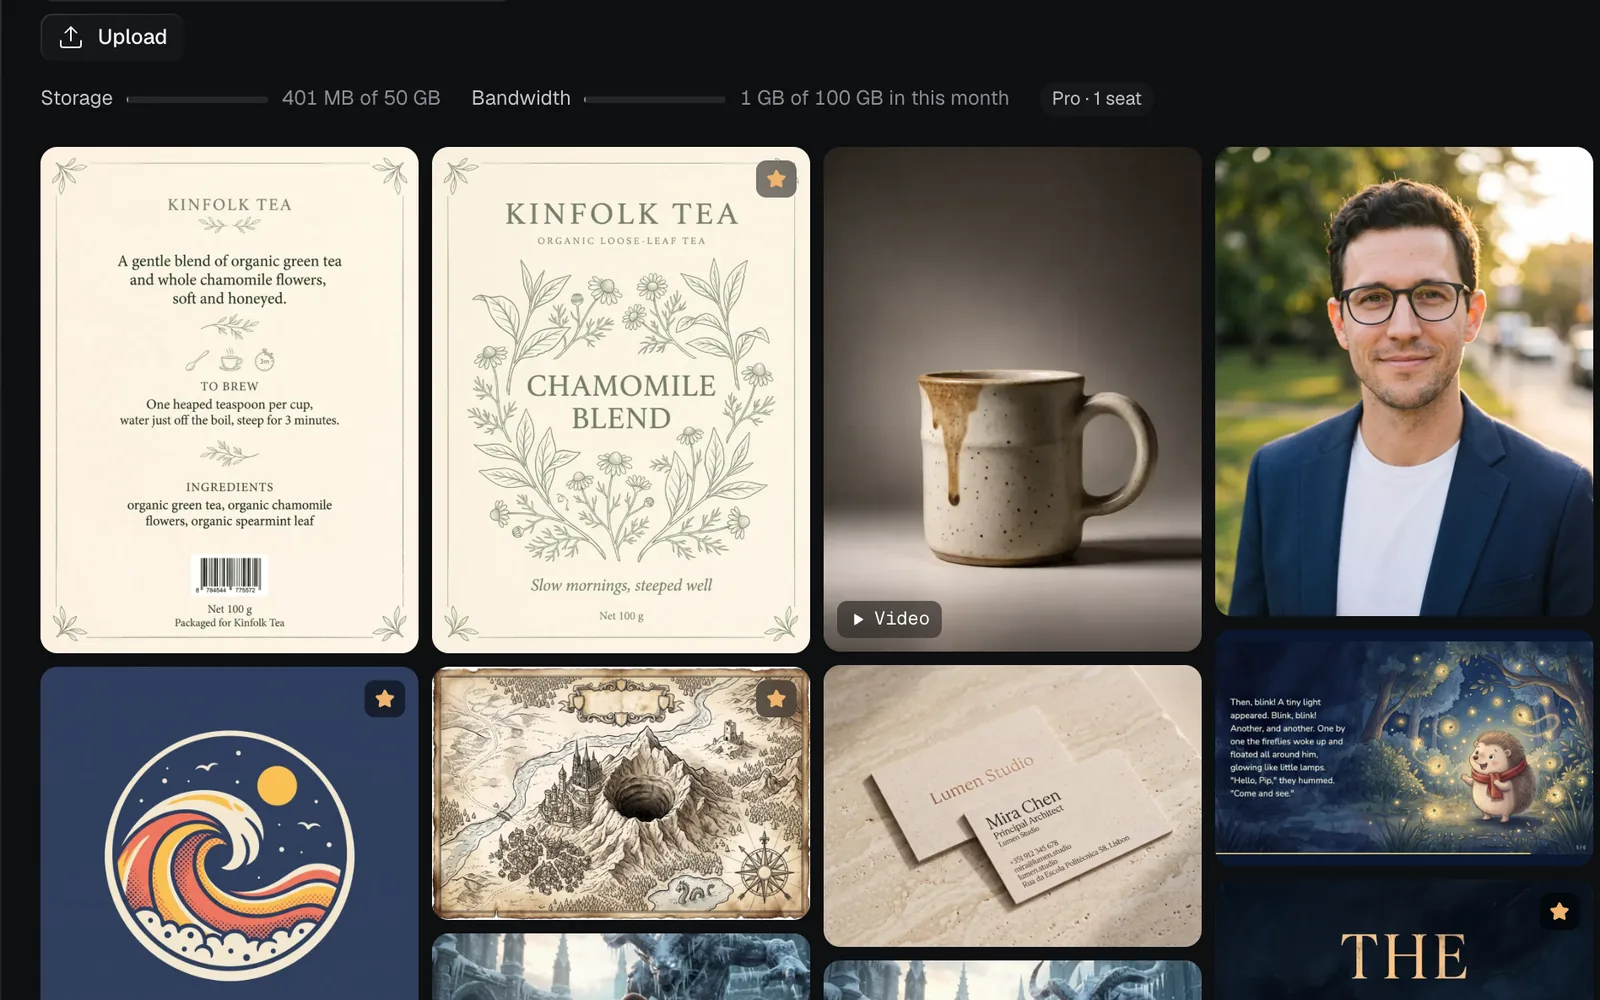
The bar at the top:
| Control | What it does |
|---|---|
| Search names and prompts | Finds files by name, or by the prompt that made them |
| All, References, Generated | Every file, files people added, or files a model made |
| Image, Video, Audio, 3D, Code, PDF | Show one kind; combine it with References or Generated |
| Everything, Starred, Trash | All files, your starred ones, or deleted ones |
Click a pressed filter to turn it off; All clears the kind and the source. The count at the end of the bar ("4 of 25") says how many files show. Upload adds files from your computer, and you can drop files anywhere on the Library too: pictures, clips, sounds, GLB models, HTML pages and PDFs. Text and Markdown files go on a canvas, as documents.
Under the bar, Storage shows how much your files take of your plan's room, and Bandwidth how much was served this month; click either for its page.
Tools on a tile
Point at a tile for its buttons:
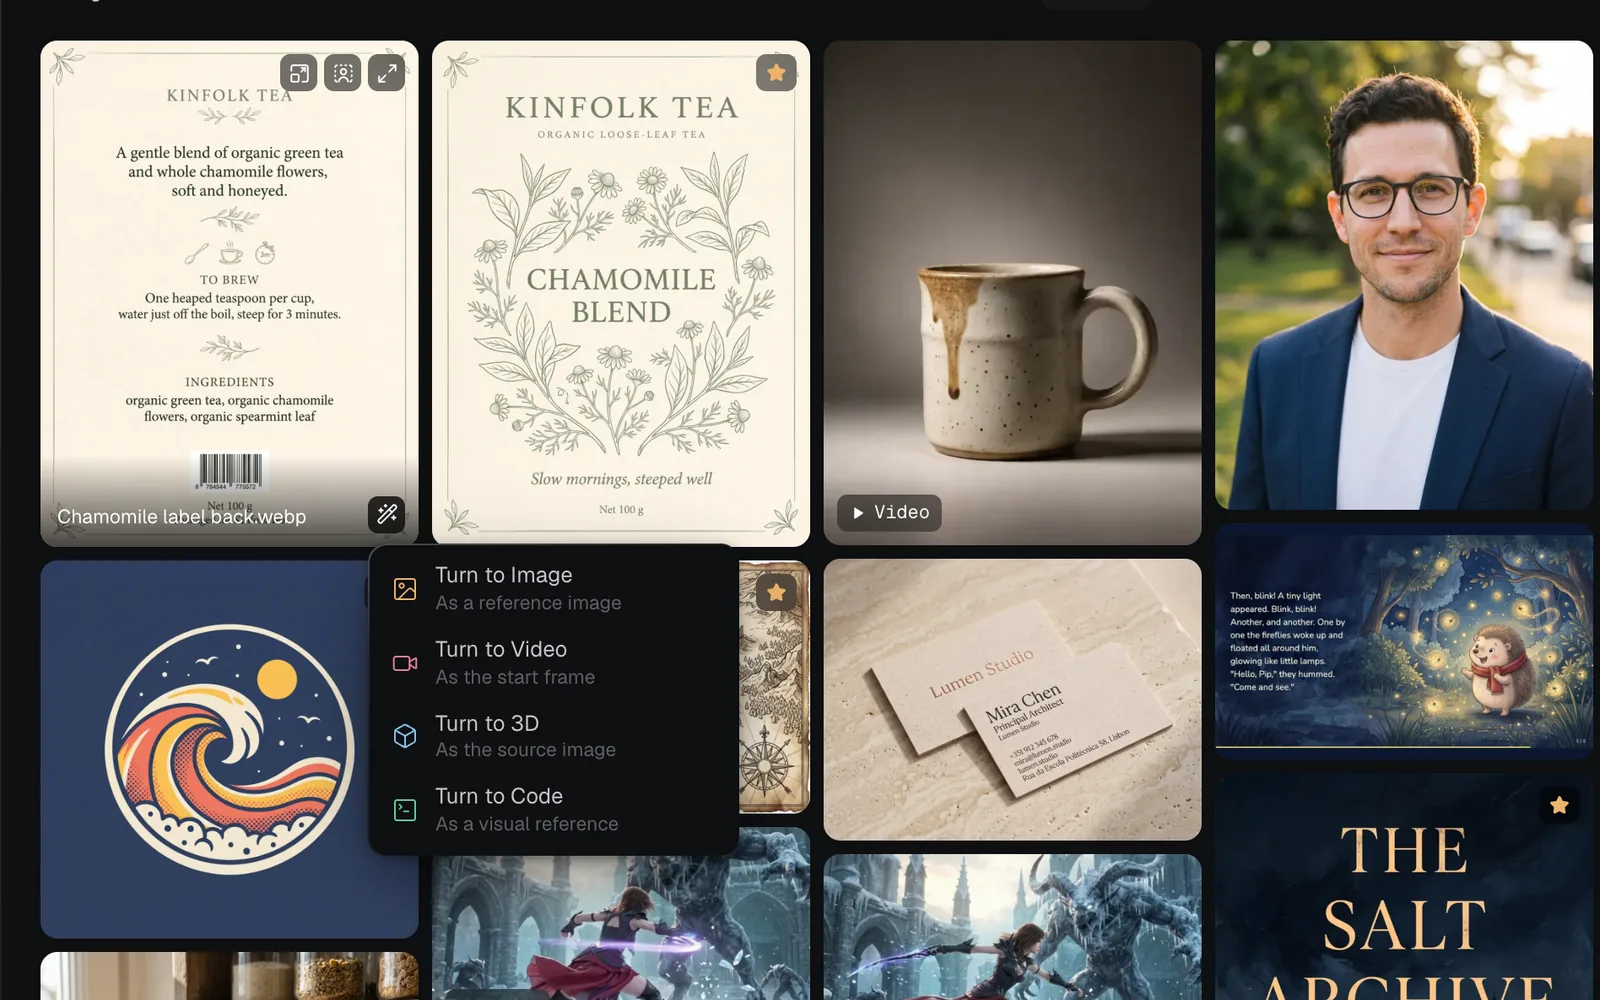
- Turn to… (the wand): Turn to Image, Turn to Video, Turn to 3D or Turn to Code opens that view with the file attached to the prompt, each row saying how it's used ("As a reference image", "As the start frame"…). See Use a reference image.
- Open in canvas: when the file is on a canvas, goes to its node there.
- Remove background and Upscale ×2 on pictures, each with its price before it runs: see Upscale and remove the background.
- View full size (the corner button).
Star, rename and download files
Open a picture, clip or model from the Library to see its details on the right, under its prompt:
- Star keeps it in Starred (in the sidebar, and in the Library's Starred), with a star on its tile. Stars are yours alone. The full view has a star at the top too.
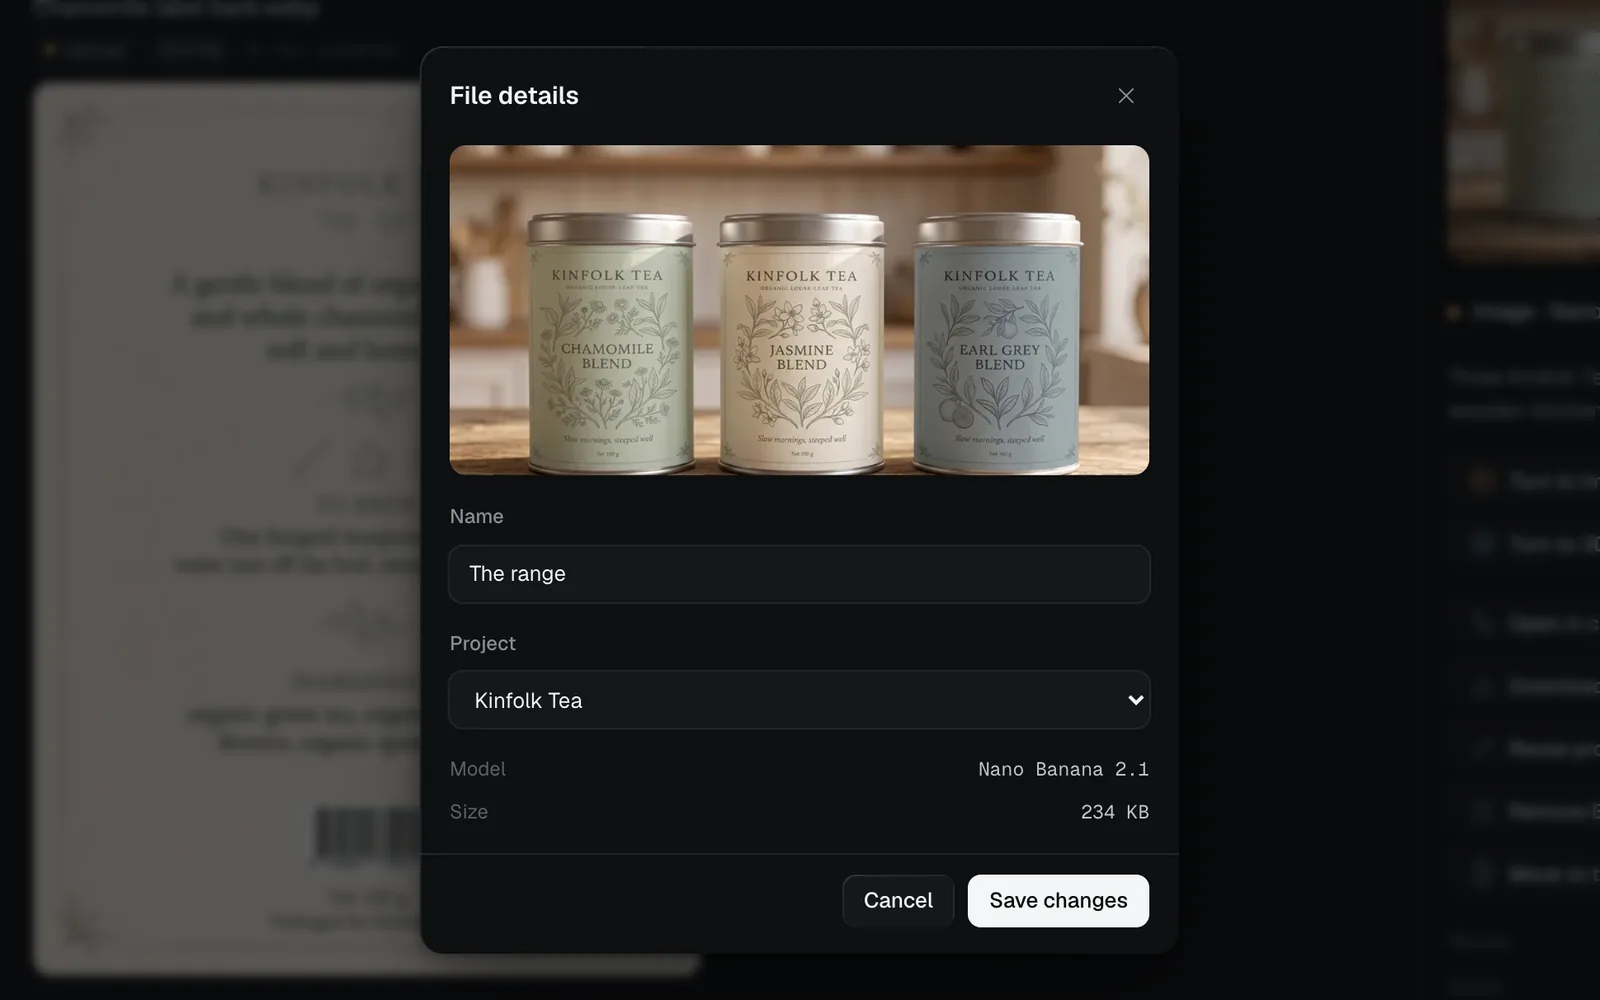
- Details opens "File details": change its Name or its Project, then Save changes.
- Download saves the original file.
- Open in canvas goes to it on its canvas, or opens it on a new canvas named after it.
- Copy to… copies it to another workspace you belong to.
Group files and canvases in projects
A project keeps a client's or a campaign's canvases and files together.
- Click the + beside Projects in the sidebar, type a Name and click Create project. Its page opens.
- Drag canvases from the sidebar onto the project, or right-click a canvas and choose Move to project.
- To file a single file, open its Details and pick the Project. While a project's page is open, files you upload and pictures you upscale or cut out go into it.
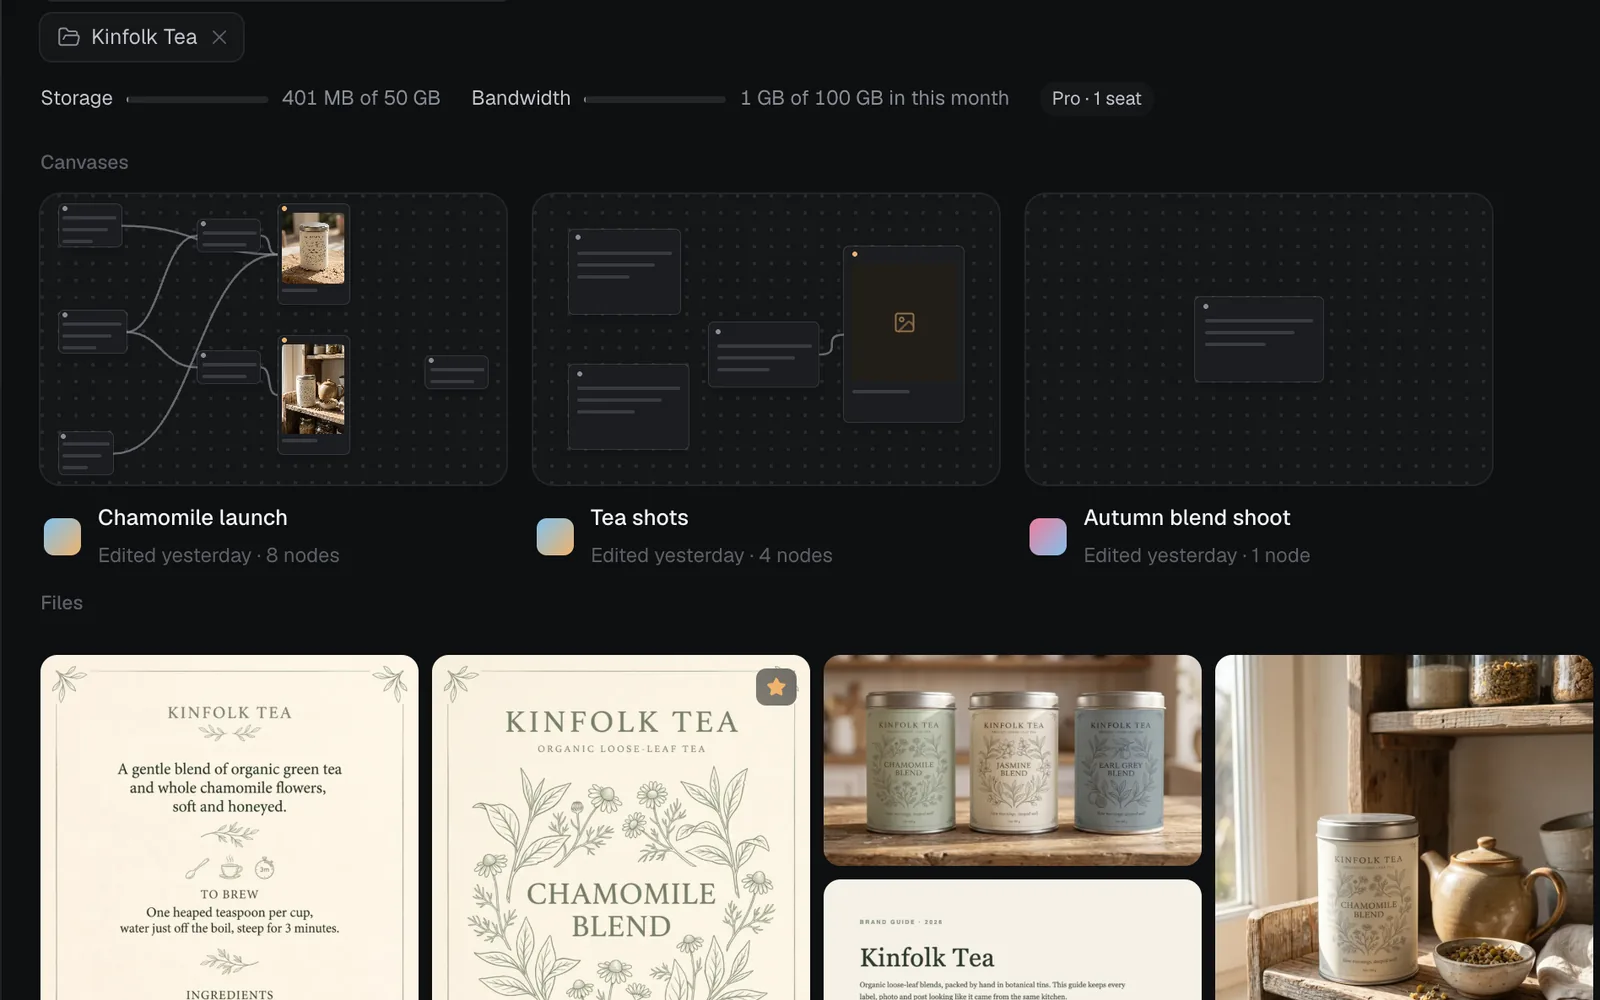
A project's page lists its Canvases, then its Files: the ones filed in it and every file on its canvases. The filters and search work on it the same way; the project's chip in the bar (✕) goes back to the whole library. Free has 1 project; Starter, Pro and Max have as many as you like. More in Organize a canvas.
Delete and restore files (Trash)
- Move to trash is at the bottom of a file's details. Deleting a node on a canvas keeps its file in the Library.
- Open the Trash from the Library's Trash, Trash in the account menu, or ⌘K.
- Deleted canvases come first, each saying when and by whom ("Deleted yesterday by you"). Click one to restore it, or use its ⋯ menu for Restore and Delete forever….
- Deleted files come next. Click a tile to restore it ("Restored from trash"). The bin at a tile's top left (Delete forever) removes it for good, after you confirm.
- Empty Trash in the Storage row deletes every file in it, and says how much space that frees ("Empty Trash · 1.6 MB").
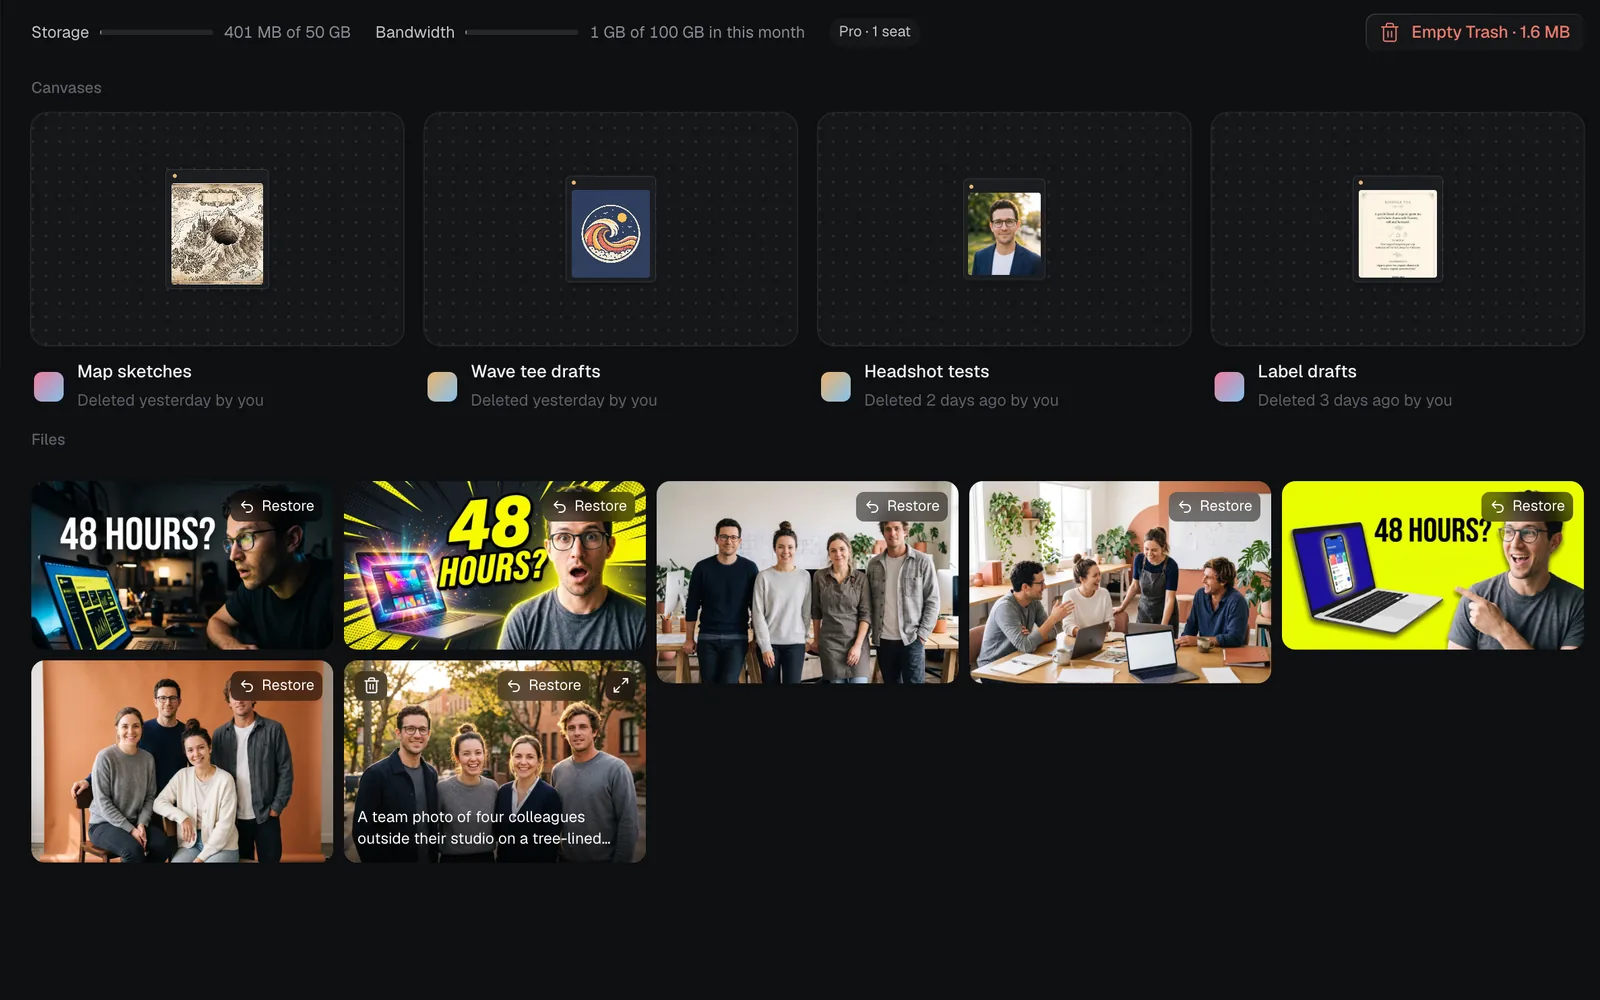
Files in the Trash still count toward your storage until they're deleted forever, and nothing empties the Trash on its own. Deleting forever can't be undone: nodes that showed the file show it as missing. You can delete your own files forever, or anyone's if you own the workspace.
Put a library file on a canvas
- On a canvas, click Show layers at the top left and open the Assets tab. It lists your newest files under Upload files.
- Click a file, or drag it onto the canvas. It arrives as a Reference node.
- Drag from its + onto the node that should use it.
In a prompt, type @ to pick from On this canvas or Library: a library file is added beside the node, wired in. From the Library, Open in canvas takes you to where a file already is.
Tips and limits
- Someone you share a canvas with as a viewer can't add files to it.
- Drop a scanned PDF and the canvas offers Add pages as pictures, so a model can look at its pages (see Drop a PDF).
- A design system (.zip, tokens .json or CSS variables) dropped on a canvas becomes a design system node: see Design systems.
- Generated files keep the prompt and model that made them; uploads say "Uploaded". Search finds either.
What's next
- Prompts, documents and skills: briefs, PDFs and skills that feed your nodes.
- Organize a canvas: sections, notes and projects.
- Canvas templates: prompts already wired to the right node.
- Image generation: use a library picture as a reference.