Image editing
Edit images with AI in Fil: inpaint a marked area, outpaint past the edges, crop, change the camera angle, split into layers, upscale or remove the background.
Fil's image editor changes a picture you already have: one you made, uploaded or dropped on a canvas. Mark an area and say what should change, extend the picture past its edges, crop it, see it from another camera angle, cut it into layers or a grid, double its size or cut out its subject. Every edit makes a new picture, so the original stays as it was.
Open the image editor
On a canvas:
- Point at a picture: one on an Image node, or a picture file on the canvas. Two buttons appear at its top right.
- Click the brush (its tooltip reads Edit). A menu headed Edit lists every tool.
- Pick one of the first six tools. The picture opens full screen on that tool, in the full view's Edit tab. The last two, Remove background and Upscale ×2, add a node instead (see below).
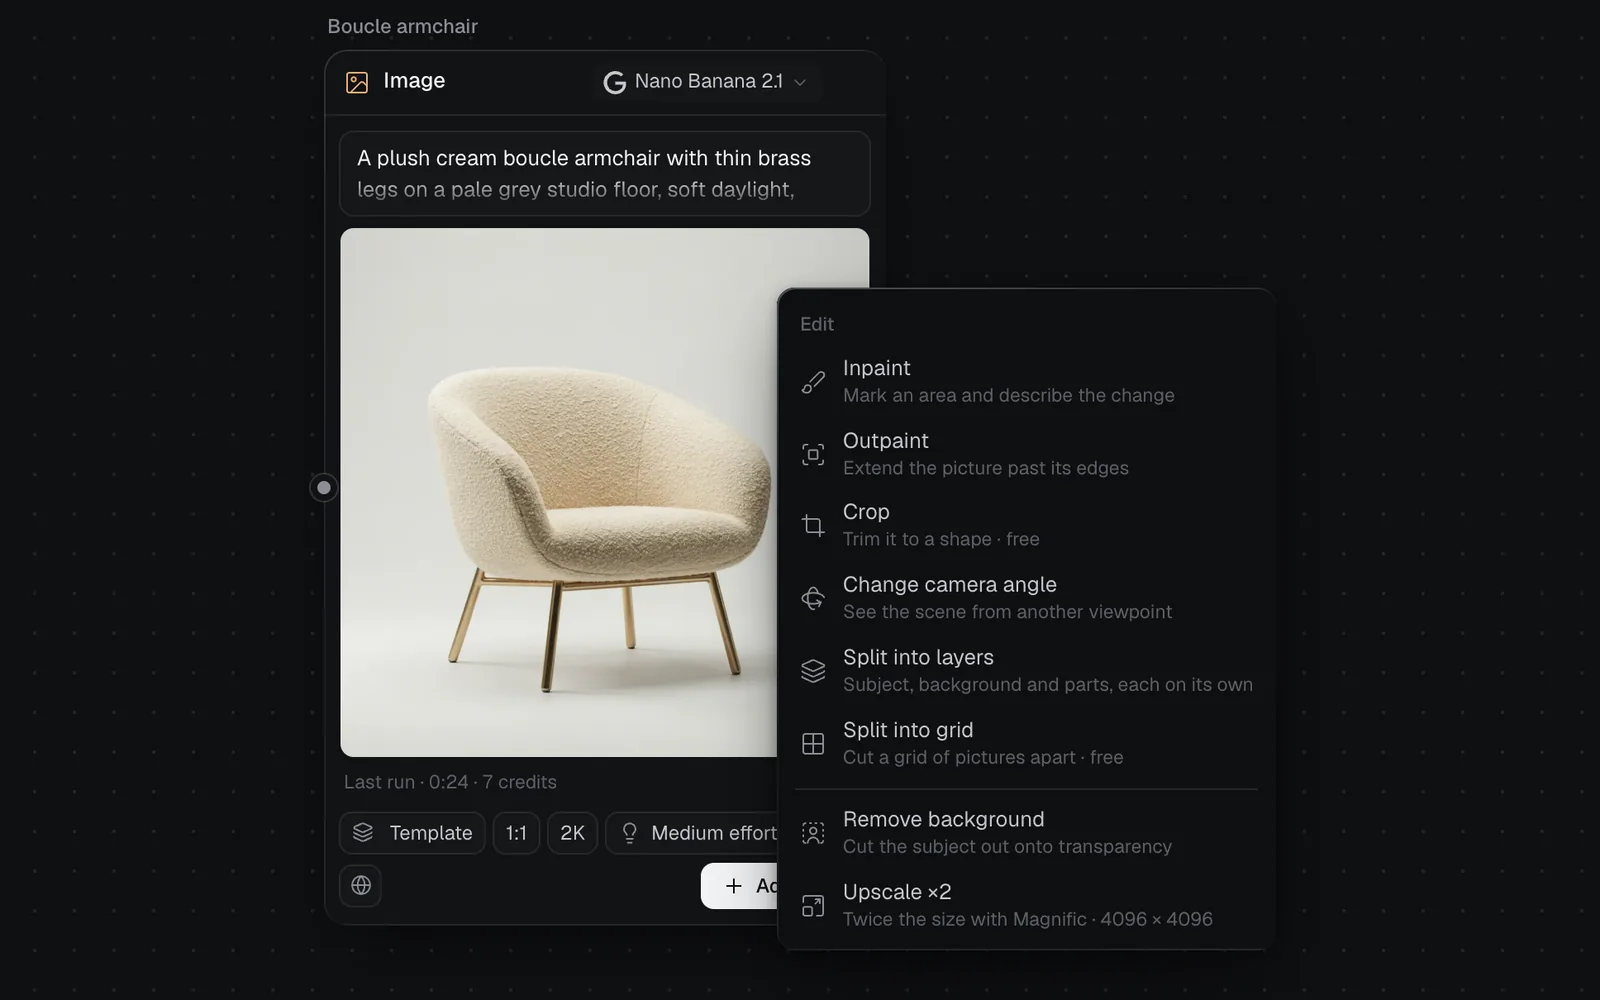
Other ways in:
- Select the node and click Edit in the panel on the right. It opens the same menu.
- Open the picture full size (double-click it, or click the expand icon, View full size), then click the Edit tab at the top right, beside View.
- In the Image view and the Library, open a picture with View full size and click Edit.
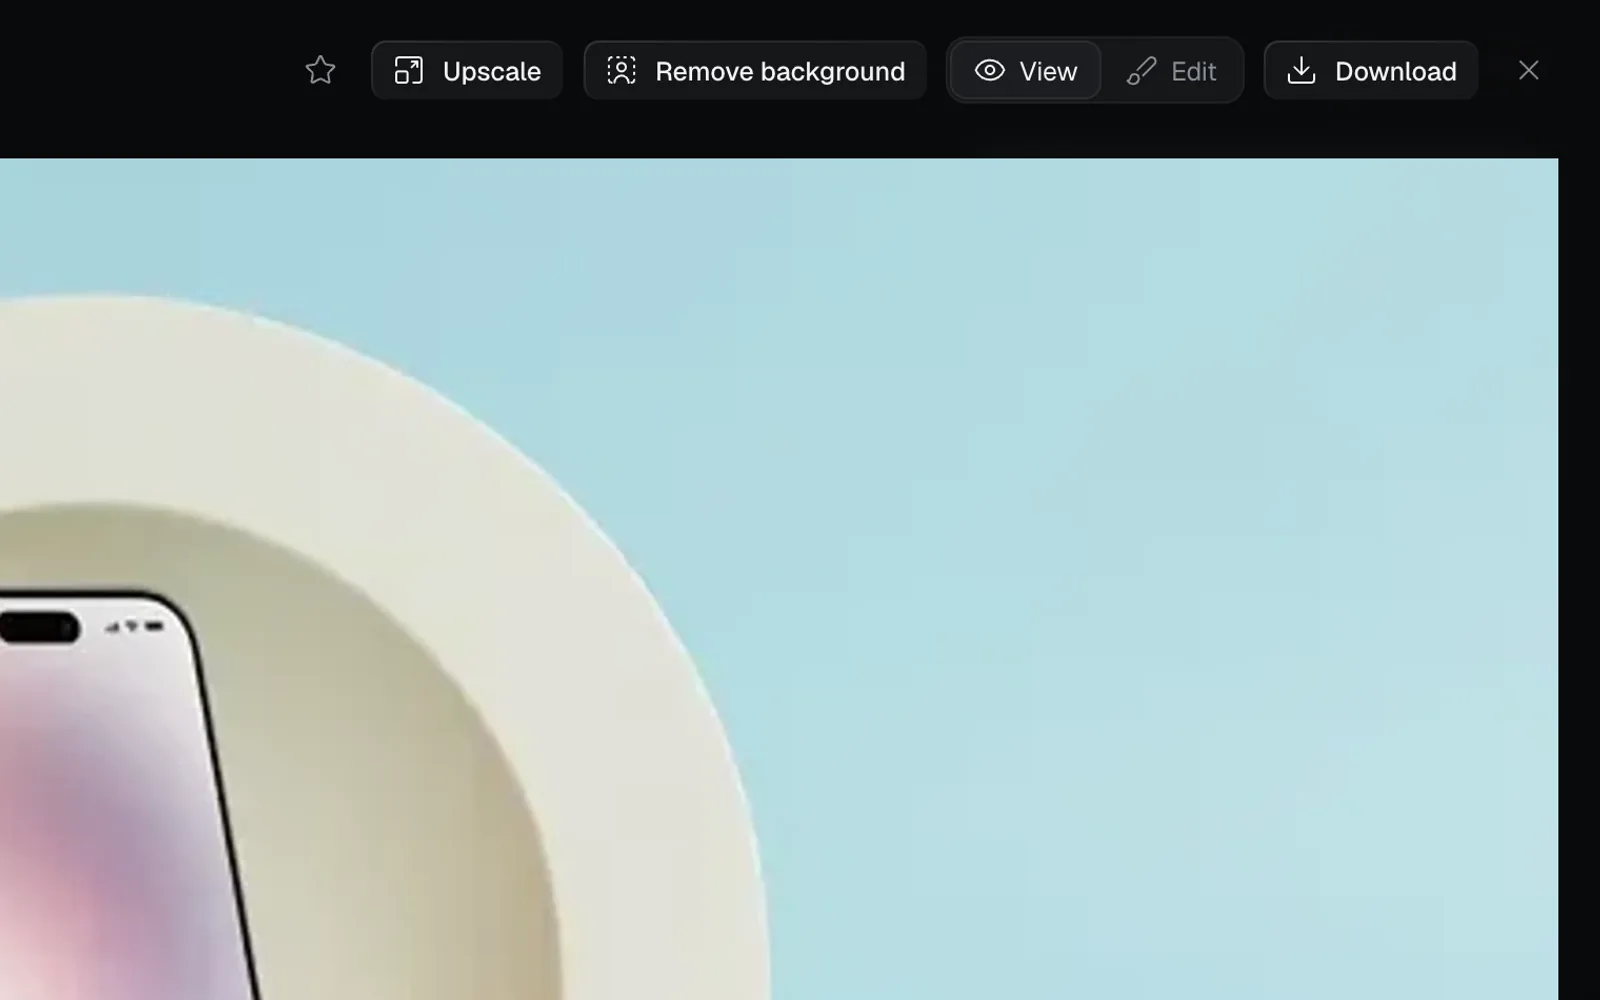
In the full view's bar, Upscale and Remove background sit beside the tabs. On a canvas they add a node that waits for Generate; in the Image view and the Library they ask first in a small menu with the price. See Upscale and remove the background.
Switch tools from the rail
The tools sit in a rail on the left of the full view: Inpaint, Outpaint, Crop, Angle, Layers and Grid. Point at one to see what it does, and click it to switch. Once you've picked a tool there, the rail shrinks to icons in the top left corner. Each tool keeps its marks and settings while you switch tools or go back to View. Download saves the picture as it is, and ✕ or Esc closes the full view.
Every image tool, and what it costs
| Tool | Credits | What it does |
|---|---|---|
| Inpaint | 8 | Changes the areas you mark |
| Outpaint | 8 | Extends past the edges |
| Crop | Free | Trims to a shape |
| Change camera angle | 9 | Reshoots from another viewpoint |
| Split into layers | Up to 41 | Puts each element on a layer |
| Split into grid | Free | Cuts a sheet into pictures |
| Remove background | 1 to 10 | Cuts out the subject |
| Upscale ×2 | About 34 or 46 | Doubles the size |
The names are as the Edit menu has them; in the rail, the last three are Angle, Layers and Grid. Prices are for a 16:9 picture at 2K and Medium quality, one image a run: Inpaint and Outpaint on GPT Image 2.5 Sunburst, Angle on Seedream 5.0 Pro. Upscaling is priced by size, about 34 credits for 2048 × 1152 and 46 for 2560 × 1440, and Magnific's prices follow the euro, so they can move by a credit. Each tool's price shows on its button before you start, and its page lists what changes it. Crop and Grid run in your browser, so they cost nothing.
Where each tool works, and what it makes
No tool changes the picture you started from: each makes something new beside it.
- Inpaint, Outpaint, Angle: on a canvas, a new Image node wired from the original, named Edit 2, Outpaint 2 or New angle 2. It starts at once, and the full view closes to show it. In the Image view and the Library, a new run at the top of the Image view.
- Crop, Grid: new picture files beside the original. Outside a canvas, new files in the Library, which opens.
- Layers: the layers, kept on the picture's own node. Layers is on a canvas only.
- Remove background, Upscale ×2: on a canvas, a Cutout or Upscale node wired from the original, waiting for Generate. Outside a canvas, a menu with the price, then a new run at the top of the Image view.
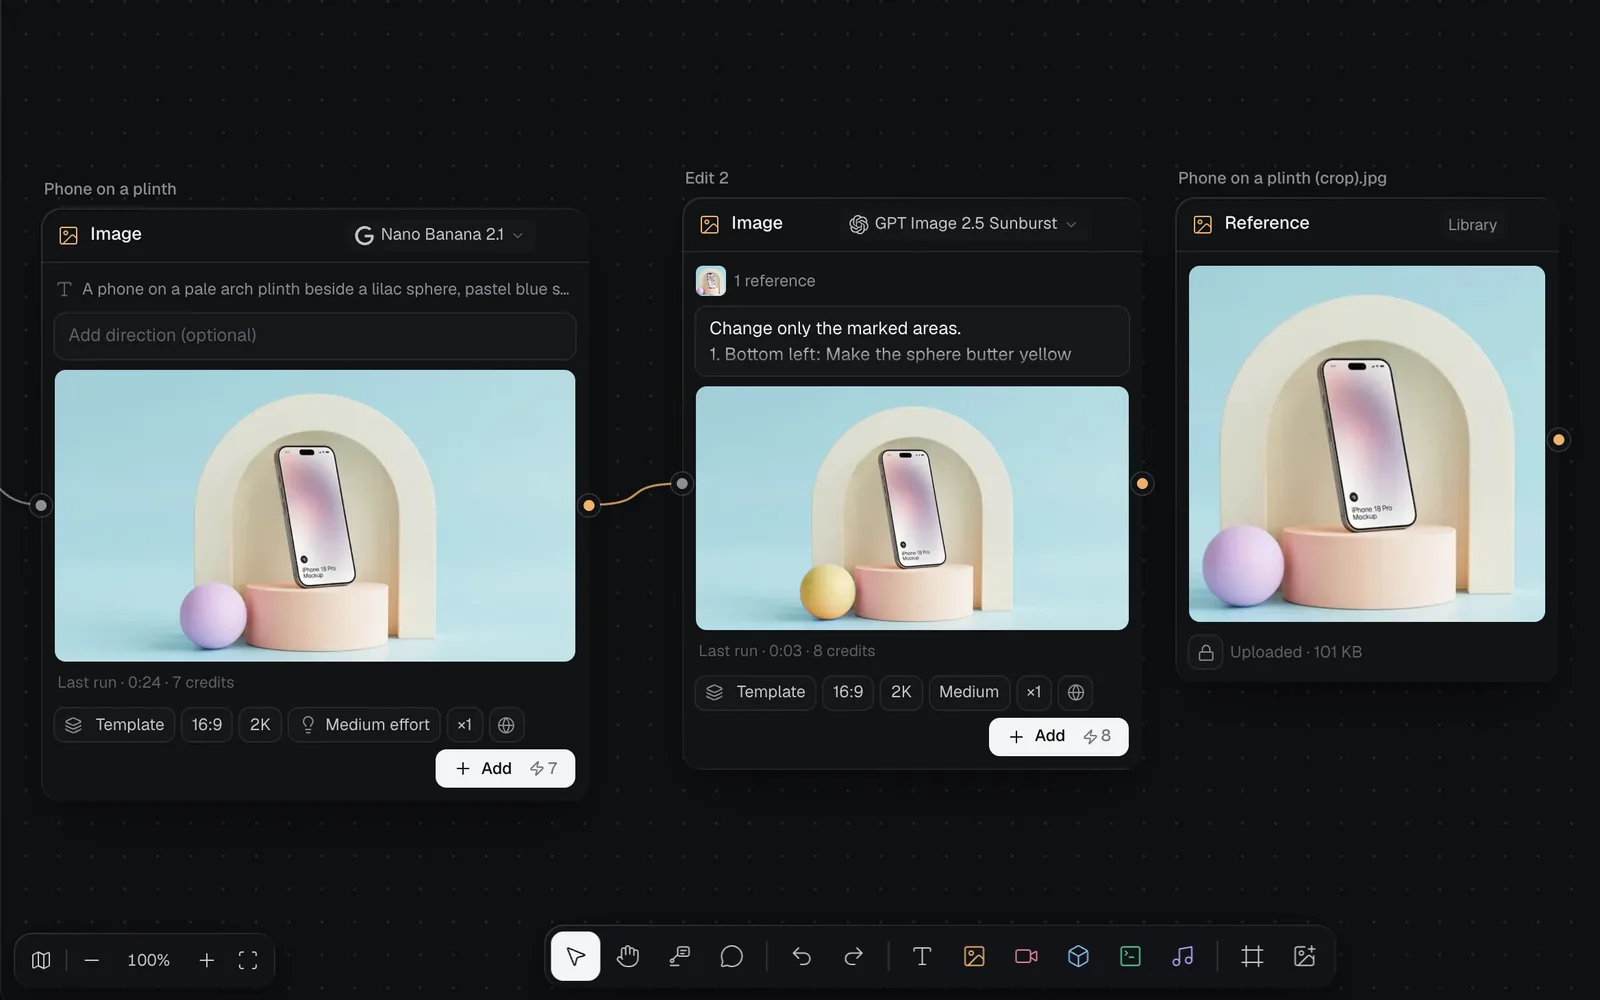
The number in a node's name counts the Image nodes on the canvas, so yours may read Edit 3 or Outpaint 5. An edit's node keeps what you asked for: select it, and its panel shows Asked for with your words and, for an inpaint, the areas you marked.
Who can see an edit
On Free, all work is public and shows in Community. On Starter, Pro and Max:
- On a canvas, an edit, an upscale or a cutout is public or private as the picture's node is. The globe or lock beside Generate in the editor says which, and clicking it switches the picture's node too.
- Crops and grid pieces are new files, and start private.
- Outside a canvas, edits follow the globe or lock you set for new work.
See Credits and plans.
Tips and limits
- Only people who can edit a canvas get the Edit tab on its pictures.
- An SVG made in code has Inpaint alone, and it's edited as code: see Edit an SVG.
- Runs from the editor don't wait for a review: Generate starts them straight away, at the price on the button.
- When a tool can't run, the line beside its chips says why (not enough credits, or a model that isn't set up), and Generate stays grey.
- Runs can't be stopped once they start, except an inpaint on Grok Imagine 2.0 or Qwen Image 3. A run that fails, or that the model's provider blocks, gives its credits back.
- Upscale ×2 disappears once a picture is 3840 px on its long side, and Remove background isn't offered on a picture that's already a cutout.
What's next
- Edit part of an image (inpaint): mark an area and describe the change.
- Extend an image (outpaint): make room around a picture and fill it.
- Split an image into layers: move each part, then animate the layers into a video.
- Image generation: make the pictures to edit.