Image generation
Generate AI images from a text prompt or a reference image with Nano Banana 2.1, GPT Image 2.5 and Ideogram 4.5, then upscale them or remove the background.
The Image view turns a prompt into pictures. Describe what you want, pick a model and press Generate: the picture lands at the top of your feed, usually within a minute, and stays in your library. Every picture can then become the start of something else: a new version, a video, a 3D model or a page.
Generate an image from a prompt
- Click Image in the sidebar, or press I anywhere outside a text field or a canvas.
- Click the prompt box at the bottom (or press /) and describe the picture: the subject, where it is, the light and the style.
- Check the chips under the box: the model, then its shape, size and other settings. To change one, click it and pick from its menu. The price shows beside Generate.
- Press Generate, or Enter. ⇧Enter starts a new line instead.
- The run appears at the top of the feed with a timer and "Usually under a minute", and a note says "Generation started. You can leave and come back." Runs keep going if you leave the view or close the tab.
The panel on the right shows the newest picture unless you've selected one; if you have, click the new tile to see it there. In a narrower window the panel becomes a drawer: open it with Details at the top right of the feed.
Choose a model
The first chip under the prompt is the model. Click it to open the Model menu, which shows each model's maker, what it's good at, whether it takes reference pictures, and its top resolution. The Image view opens on the model you used last for pictures, here or on a canvas; without one it starts on Nano Banana 2.1.
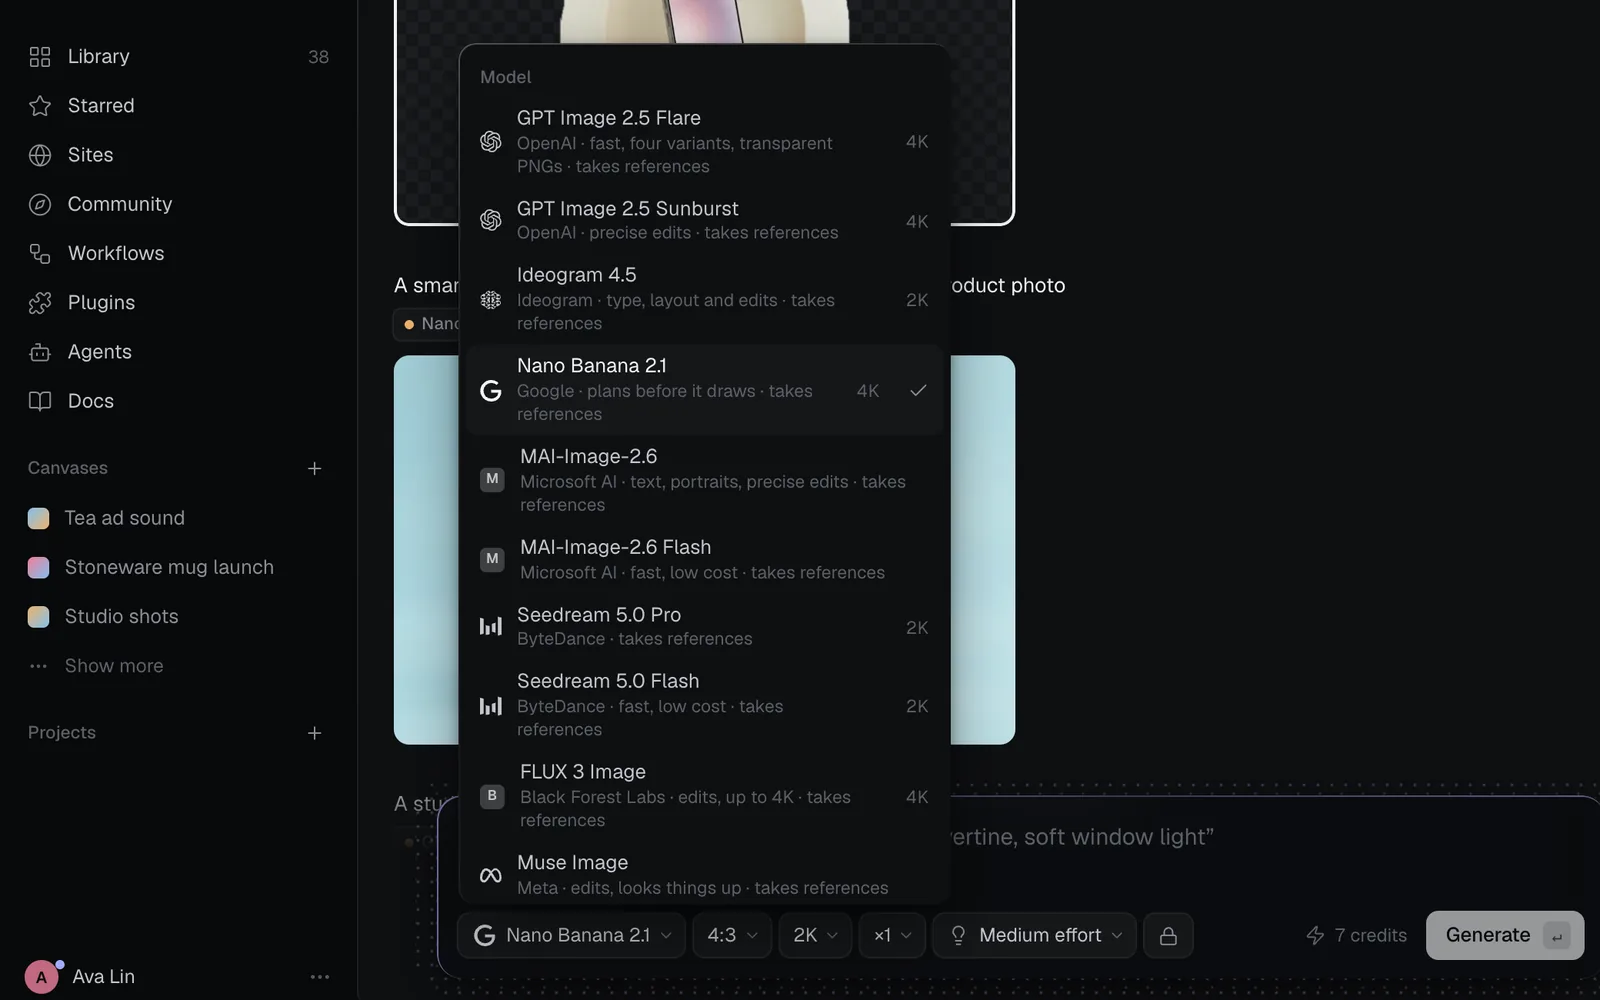
Which to pick:
- Most pictures: Nano Banana 2.1. It plans before it draws, takes up to 14 references and goes to 4K.
- Words in the picture (posters, labels, logos): Ideogram 4.5, or Qwen Image 3 for English and Chinese.
- A transparent PNG: GPT Image 2.5 Flare or Sunburst (see below).
- Cheap drafts: Seedream 5.0 Flash (2 credits) or Soul 2 (1 credit).
- Several takes at once: GPT Image 2.5 Flare, which makes four unless you ask for fewer.
| Model | Credits | References | Good at |
|---|---|---|---|
| Nano Banana 2.1 | 7 | 14 | Plans first, up to 4K |
| GPT Image 2.5 Flare | 30 for 4 | 16 | Four takes, transparency |
| GPT Image 2.5 Sunburst | 8 | 16 | Precise edits, transparency |
| Ideogram 4.5 | 6 | 5 | Type and layout |
| MAI-Image-2.6 | 10 | 5 | Text, portraits |
| MAI-Image-2.6 Flash | 5 | 5 | Fast |
| Seedream 5.0 Pro | 9 | 10 | Up to 2K |
| Seedream 5.0 Flash | 2 | 10 | Fast, cheap |
| FLUX 3 Image | 10 | 10 | Edits, up to 4K |
| Muse Image | 1 | 10 | Looks things up |
| Grok Imagine 2.0 | 8 | 8 | Up to 2K |
| Soul 2 | 1 | None | 720p or 1080p |
| Qwen Image 3 | 8 | 3 | English and Chinese text |
Credits are for one run at each model's own defaults, at 2K where it offers 2K. GPT Image 2.5 Flare makes four variants by default; one costs 8.
Pick the shape, size and settings
Each model shows a chip for every setting it has; a chip with only one choice is greyed out. When you switch models, the settings the new model shares stay as they were. Some settings change the price, which updates beside Generate as you pick.
| Setting | Choices | What it changes |
|---|---|---|
| Aspect ratio | 4:3 (the default), 1:1, 3:4, 16:9, 9:16, 3:2, 2:3; Nano Banana adds 4:5, 5:4, 21:9, 4:1 and 1:4 | The picture's shape |
| Resolution | 1K, 2K (the default) or 4K where offered; Seedream adds 1.5K, Soul 2 has 720p and 1080p | Size and price: Nano Banana costs 5, 7 or 13 |
| Images per run | The chip shows ×1, ×2 or ×4 (GPT Image, Ideogram, Nano Banana and Muse) | How many takes, and the price: Nano Banana costs 7, 13 or 25 |
| Quality | Low ("Fast drafts"), Medium, High ("Most detail, slower") | GPT Image and Ideogram: detail against time and price. One GPT Image picture costs 2, 8 or 30 |
| Effort | Nano Banana: Minimal, Medium (the default) or High. Muse: Low or High (the default) | How long it plans before it draws: set it to High for busy scenes and text. Nano Banana costs 6, 7 or 9 |
After the settings come:
- The lock or globe: who can see what you make (see below).
- A project chip, once your workspace has projects. It shows the project's name, or No project; pick one to file new pictures in it.
- In a team workspace, a select beside the price that picks Team credits or My credits.
Use a reference image (image to image)
Any picture in your library can guide a new one: keep the subject and change the angle, the colours or the setting.
- Click a picture in the feed or the Library to select it.
- In the panel on the right, click Turn to Image. (On a tile, hover and use the wand button, Turn to…, then Turn to Image.)
- The picture sits above the prompt as 1 reference, and the aspect ratio switches to the one nearest the picture's shape (change it back if you like). Add more references the same way, up to what the model takes.
- Describe what to change, or leave the box empty and press Enter for a new version that keeps the subject, composition and style.
- Press Generate.
- The new picture lands at the top of the feed. Click it to open it in the panel, since the panel stays on the picture you selected.
If the model you're on can't take references, the view switches to one that can and says "Switched to …, which takes the attached file." A video gives a still from the frame you were watching, and a 3D model a picture from the angle you were viewing.
Download, share and reuse a picture
Select a picture to open it in the panel on the right. Its Recipe says which model made it, how long it took, what it actually cost, and its format, resolution and size.
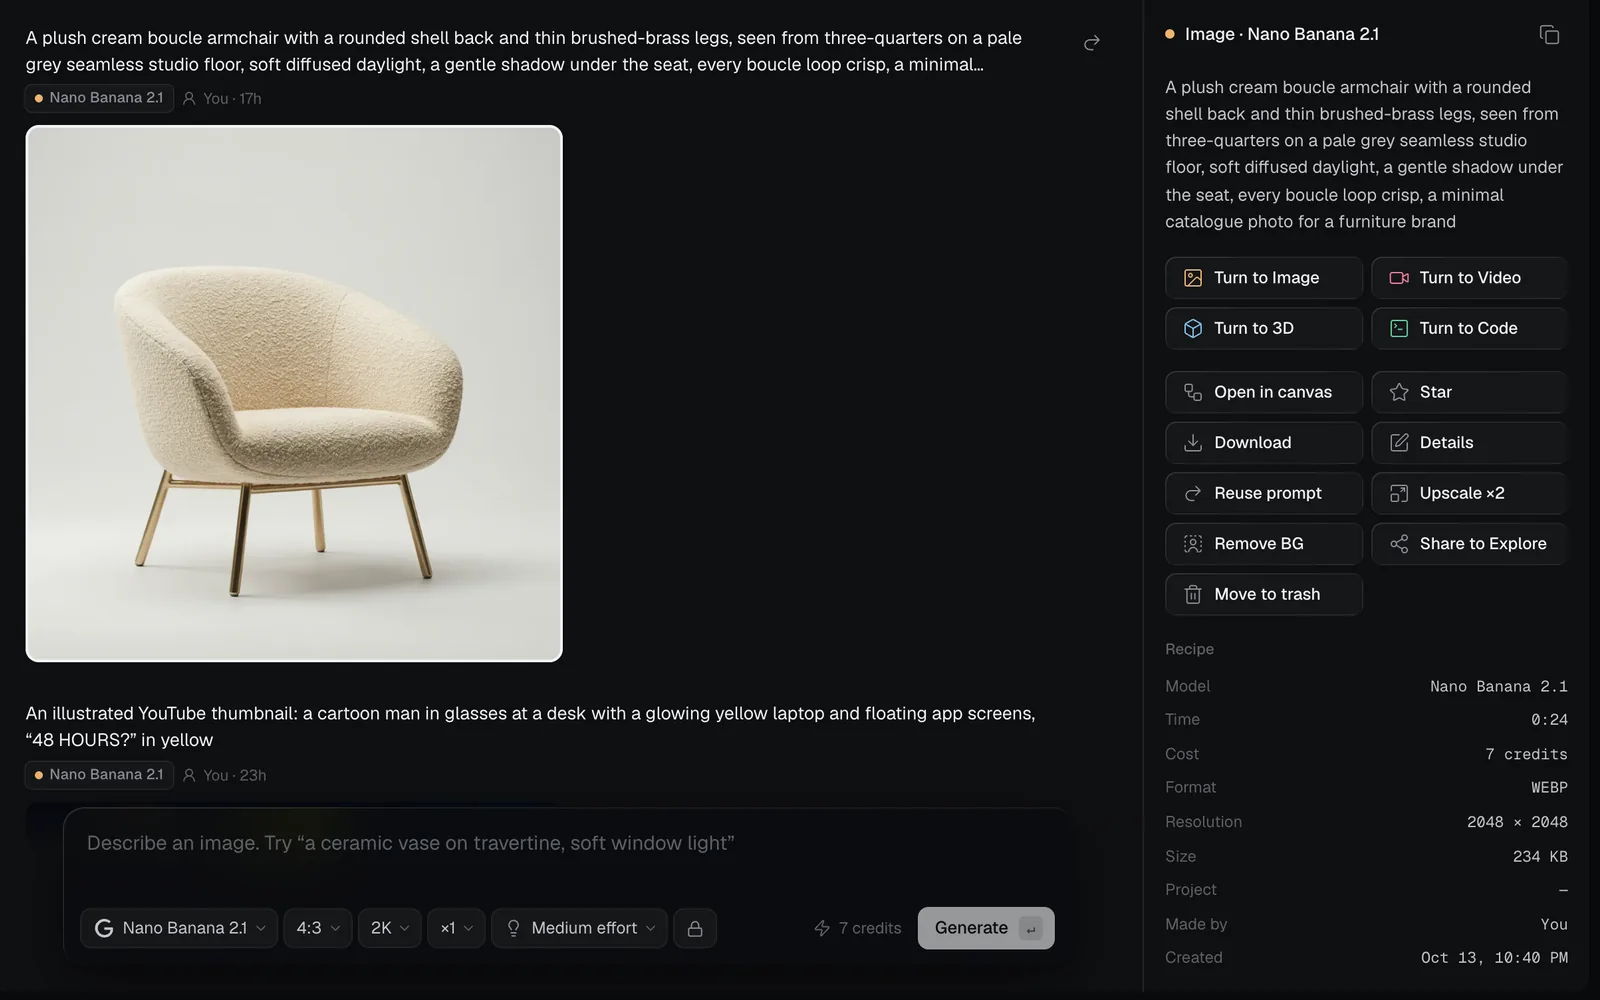
- Turn to Image, Turn to Video, Turn to 3D or Turn to Code: start the next run from it, as a reference, a start frame, a source for a model or a look for a page.
- Open in canvas: go to it on its canvas, or start a canvas from it.
- Download saves the file at full size. Star keeps it in Starred, Details renames it or moves it to a project, and Reuse prompt puts its prompt back in the box.
- Share to Explore shows it, its prompt and your name in Community.
- View full size, on the tile or on the panel's picture, opens the full view. Its Edit tab can inpaint a marked area, outpaint past the edges, crop, change the camera angle or split a sheet into a grid. Splitting into layers is on a canvas. See Image editing.
Upscale and remove the background
Both work on any picture in your library, made here or uploaded, and the result arrives as a new run at the top of the feed.
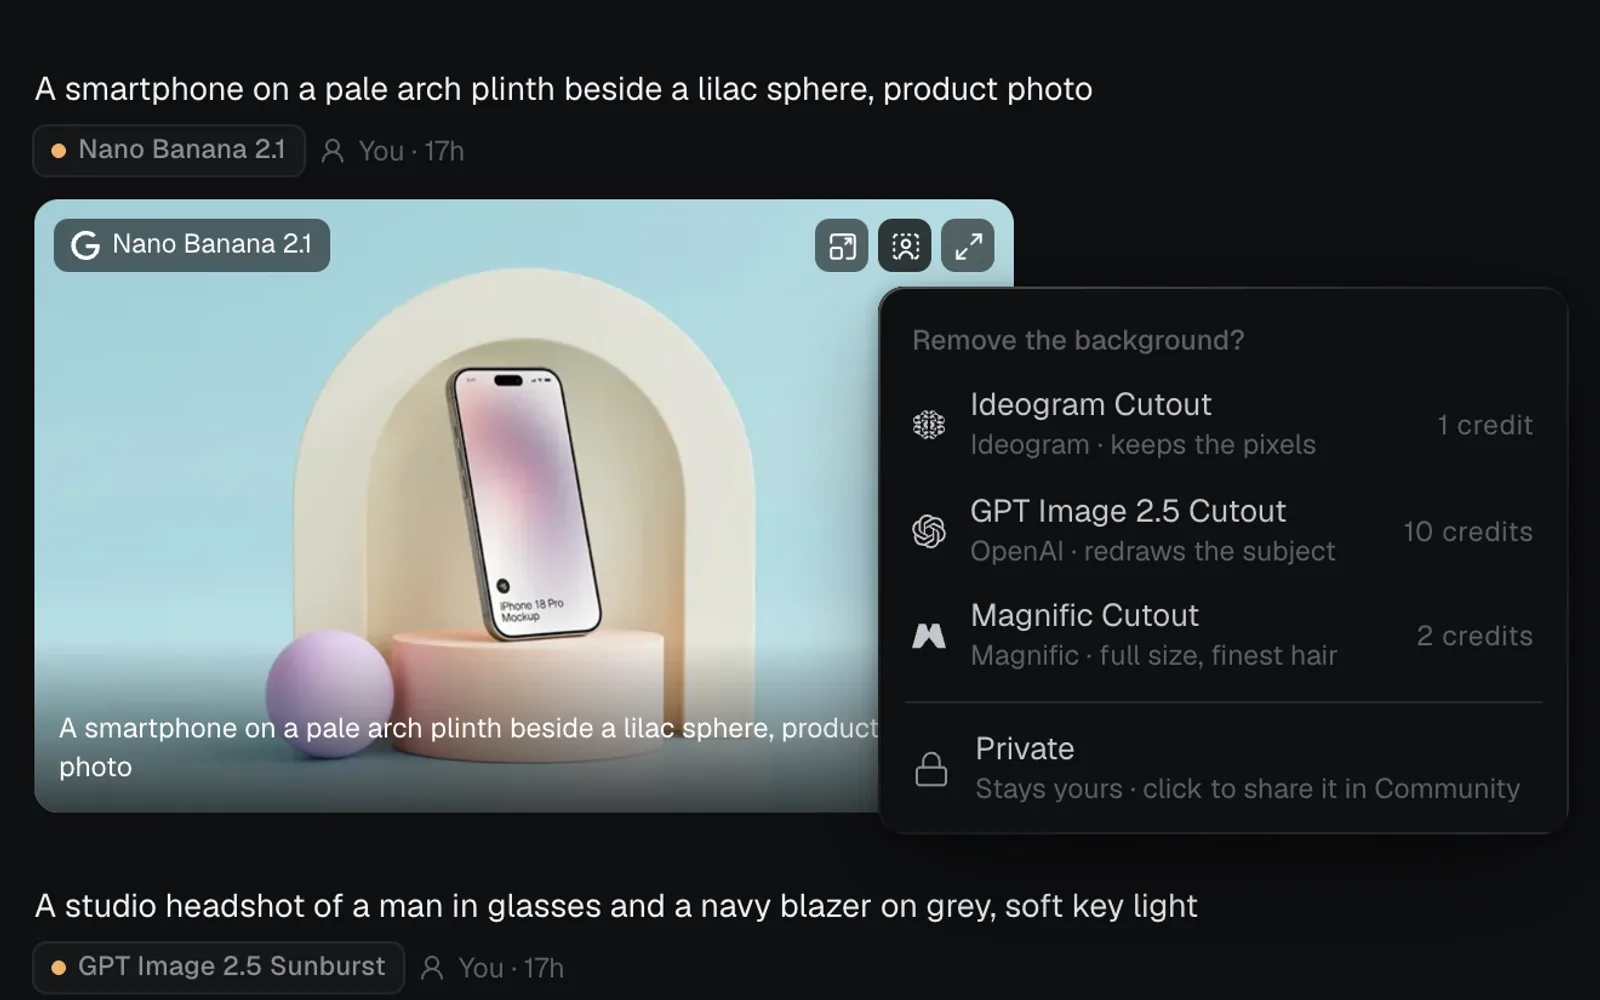
- Select the picture, then click Upscale ×2 or Remove BG in the panel. Or hover its tile and use the same two buttons in its top corner.
- A menu asks Upscale this image? or Remove the background? and shows each option with its price.
- Its last row says whether the result is Private or Public; click it to switch. Click an option to run it.
| Option | Credits | What it does |
|---|---|---|
| Upscale ×2 (Magnific) | 46 for a 2048 × 2048 picture | Doubles its width and height, up to 4K |
| Ideogram Cutout | 1 | Keeps the pixels exactly as they are |
| GPT Image 2.5 Cutout | About 10 | Redraws the subject cleanly |
| Magnific Cutout | 2 | Full size, with the finest hair |
The upscale's price grows with the picture's size: about 12 credits for 1024 × 1024 and 34 for 2048 × 1280. Upscale ×2 isn't offered once a picture is 4K, and Remove BG isn't offered on a picture that's already a cutout. On a canvas, both add a node that waits for Generate: see Upscale and remove the background.
Make a transparent PNG
There are two ways to get a picture with a transparent background:
- Generate one. Pick GPT Image 2.5 Flare or GPT Image 2.5 Sunburst and ask for it in the prompt, such as "a ceramic mug, on a transparent background". They're the only models that draw on transparency.
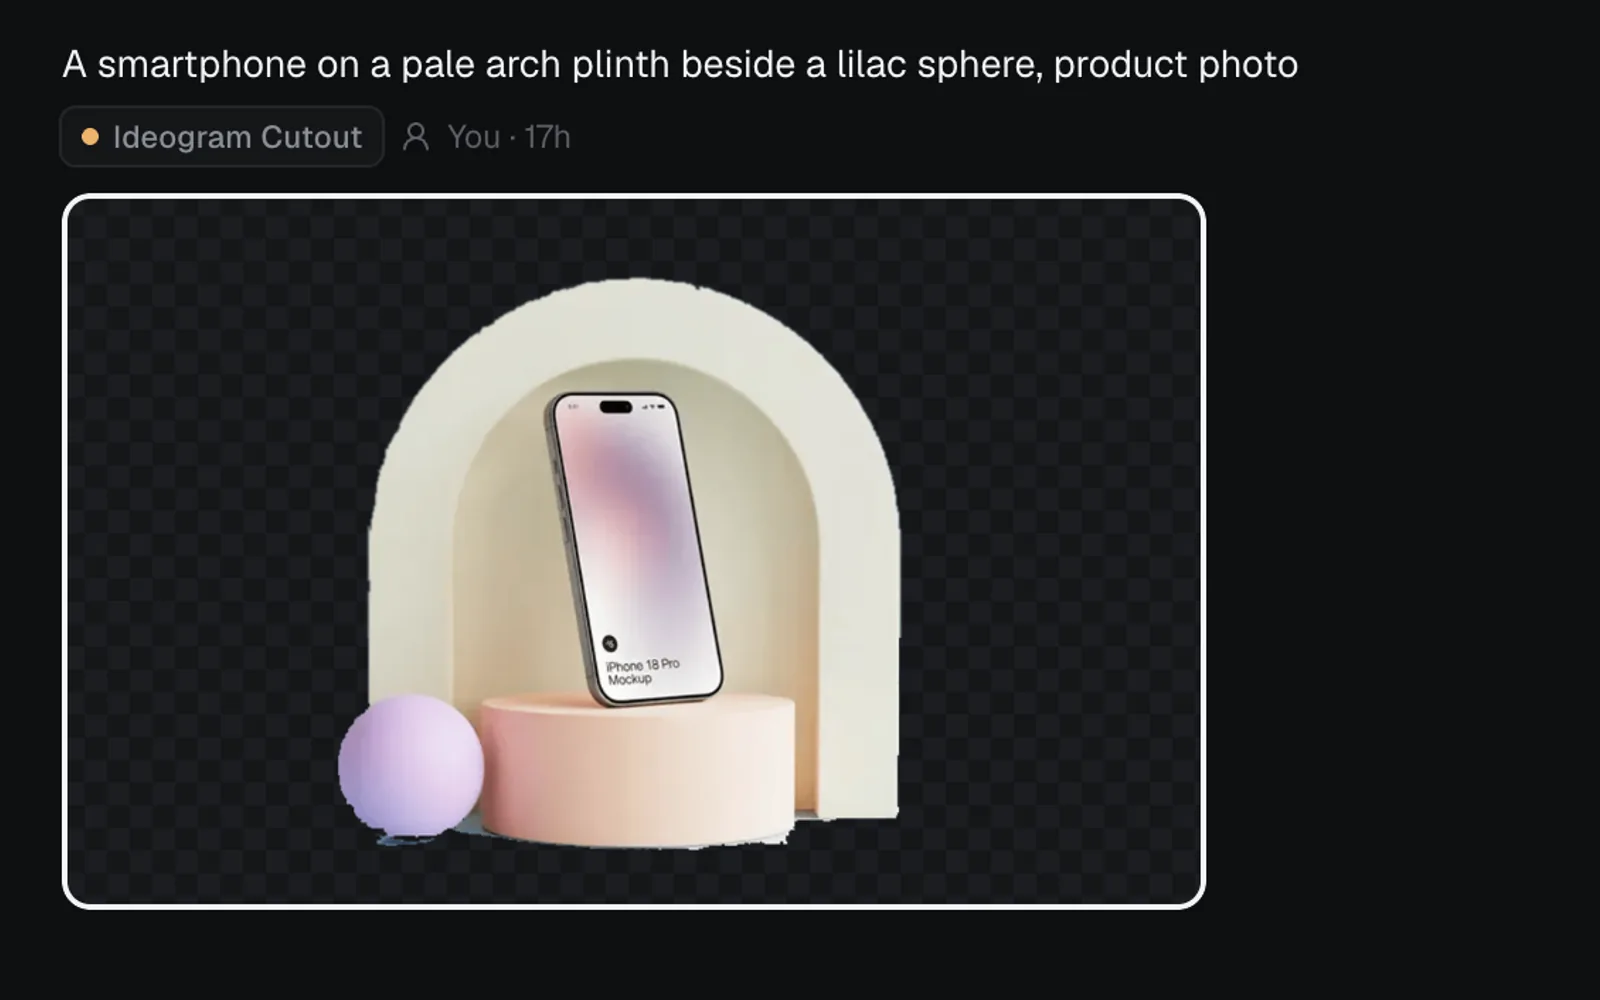
- Cut out a picture you have with Remove BG (above). Cutouts show their transparency over a checkerboard.
Either way, Download gives you a PNG that keeps its transparency, ready for a page, a social post or a layer.
Make pictures on a canvas
The Image view is the quickest way to one picture. On a canvas, an Image node does the same and connects to everything else: wire one prompt into several nodes to compare models, wire in reference pictures, and send the result on to a video as its start frame. Its Template chip picks an image template (a kind of picture made well, such as a headshot or a YouTube cover), and canvas templates add whole prompts wired to the right node.
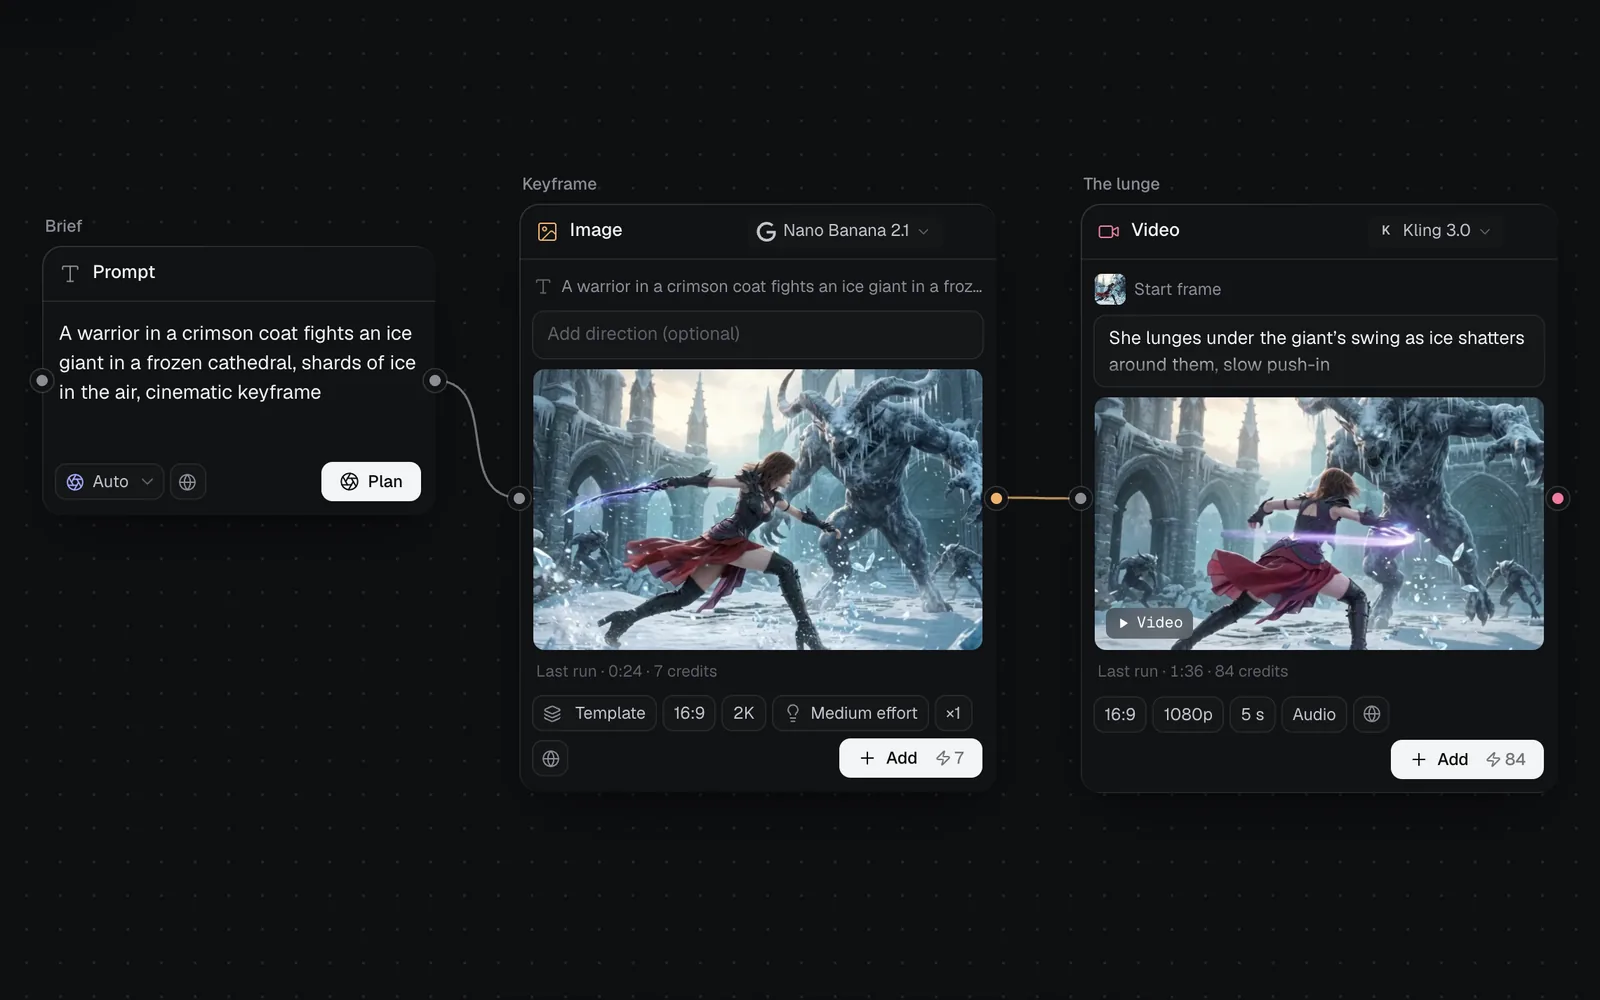
Click Open in canvas on any picture to carry on with it there.
Who can see your pictures
On the Free plan, everything you make is public in Community with its prompt. On Starter, Pro and Max, what you make starts private: the lock chip beside the settings switches it to public, and back. A picture made from a private reference stays private even with the globe on. See Credits and plans.
Costs, stopping and refunds
- A run that shows Failed or Blocked by the provider is refunded in full.
- Runs on Grok Imagine 2.0, Soul 2 and Qwen Image 3 can be stopped while they're queued or generating: press the stop button beside the run's prompt (its tooltip reads Cancel). Other models can't be stopped; the button answers "This provider cannot cancel a submitted run. It will finish and settle normally." A stopped run is still charged.
- Without enough credits, Generate says so: "This run needs 25 credits; you have 12." On Free, a daily check-in may be waiting (see Credits and plans).
- A prompt can be up to 4,000 characters.
What's next
- Image editing: inpaint, outpaint, crop, change the camera angle, and animate layers into a video.
- Video generation: bring a picture to life as its start frame.
- Workflows: ready-made canvases for logos, product shoots, thumbnails and more.
- Canvas basics: nodes, links and runs, where pictures meet everything else.