Edit part of an image (inpaint)
Inpaint with AI in Fil. Brush, lasso or box the areas to change, describe each change, and GPT Image 2.5 redraws only those areas while the rest stays.
Inpaint changes part of a picture and leaves the rest alone. Paint over what should change, say what it should become, and GPT Image 2.5 redraws only the marked areas. Use it to recolour a product, swap an object, fix a hand or put new words on a sign, several changes at once if you like.
Edit part of an image with inpainting
- On a canvas, point at the picture and click the brush at its top right (Edit), then Inpaint. The picture opens full screen, and the bar at the top says "Mark what to change".
- Already in the full view? Click the Edit tab, then Inpaint in the rail on the left.
- Paint over what should change. The Brush is picked to start. Go a little past the edges: the model blends the marked area into what's around it.
- When you let go, a box beside the mark asks "What should change here?". Type the change, such as "Make the sphere butter yellow", and press Enter or click the tick.
- Click the model chip under the picture and pick GPT Image 2.5 Sunburst. The line beside the chips changes to "Only the marked areas change."
- The editor starts on Nano Banana 2.1 (or the image model you last picked), which redraws the whole picture, so switch to Sunburst to keep the edit to your marks. See Choose a model.
- Click Generate (8 credits here), or press Enter in the text box.
On a canvas, the full view closes and a new Image node, named Edit 2 or similar, appears beside the original with a link from it. It starts at once, and the edit usually lands in under a minute. The original stays as it was.
Outside a canvas, in the Image view or the Library, open the picture with View full size and click Edit. The edit runs at the top of the Image view.
Mark the areas to change: Brush, Lasso, Box and Eraser
The marking tools are in the bar at the top of the full view.
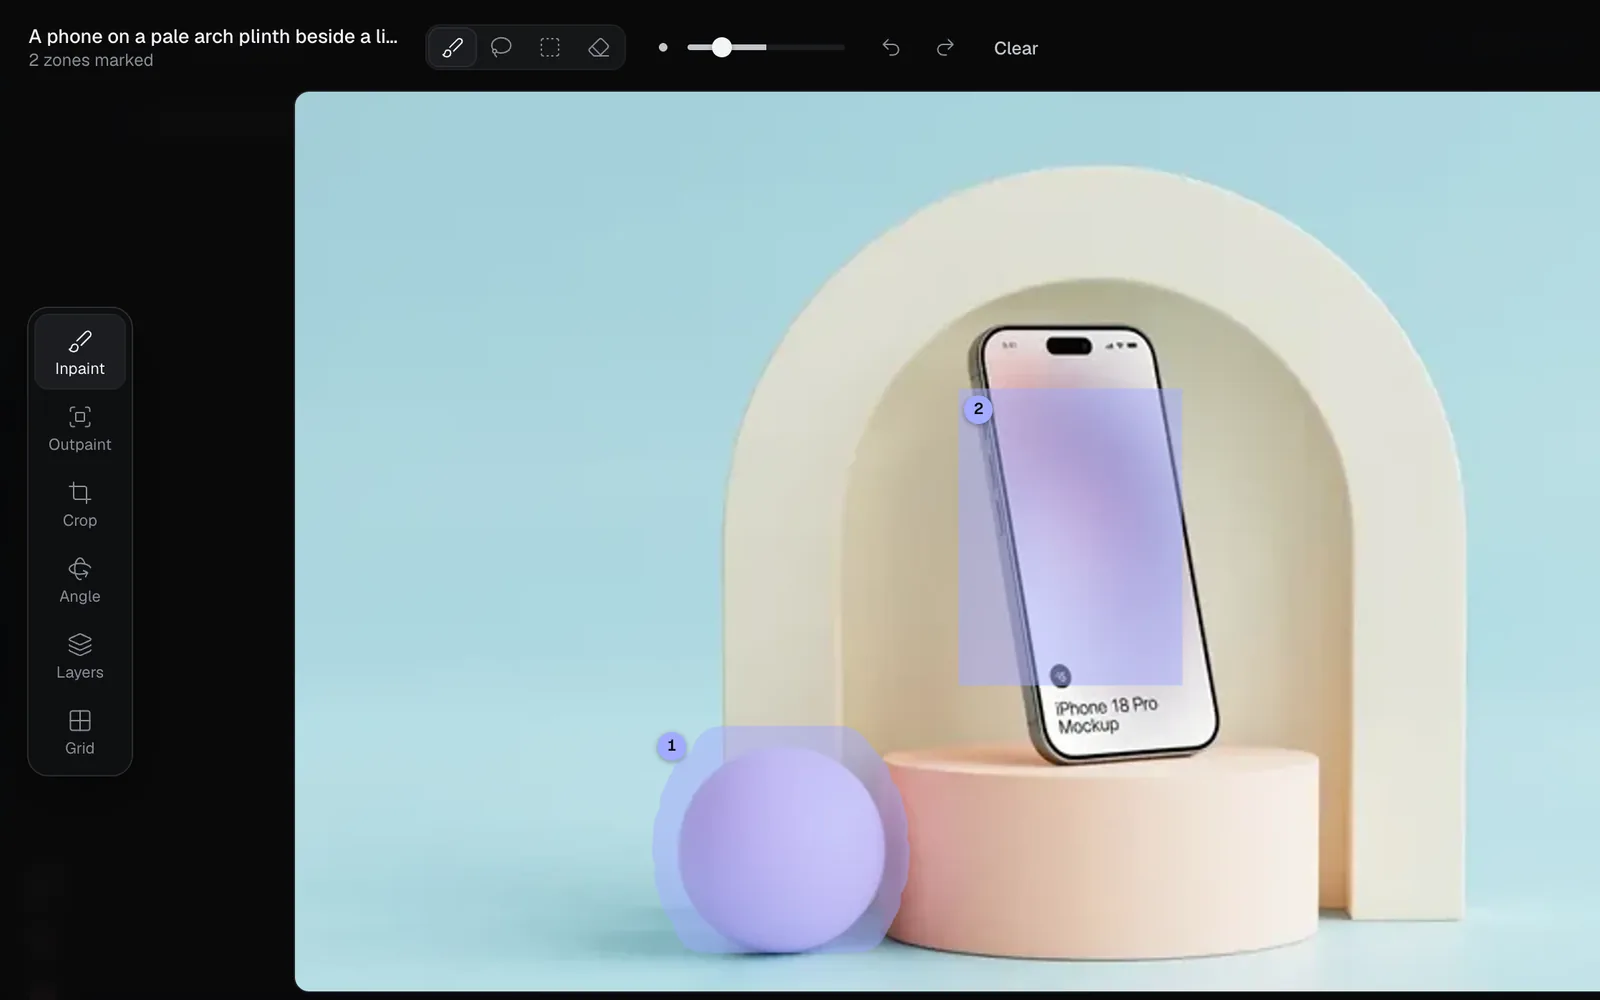
| Tool | Key | What it does |
|---|---|---|
| Brush | B | Paints the area to change. The slider beside the tools sets its size, as do [ and ] |
| Lasso | L | Draw round a shape, and the inside is marked |
| Box | M | Drag a rectangle |
| Eraser | E | Takes marks back where you paint |
⌘Z undoes a mark, and ⇧⌘Z or ⌘Y redoes it. Clear takes every mark away.
Each mark away from the others starts a numbered zone, and a mark that touches a zone joins it. Click a zone's number, on the picture or in the list below it, to change what it says. In the list, the ✕ beside a zone removes it.
Describe each change
Under the picture, each zone is listed with where it is and what should change there. The text box below them takes anything for the whole picture, such as "keep the soft studio light".
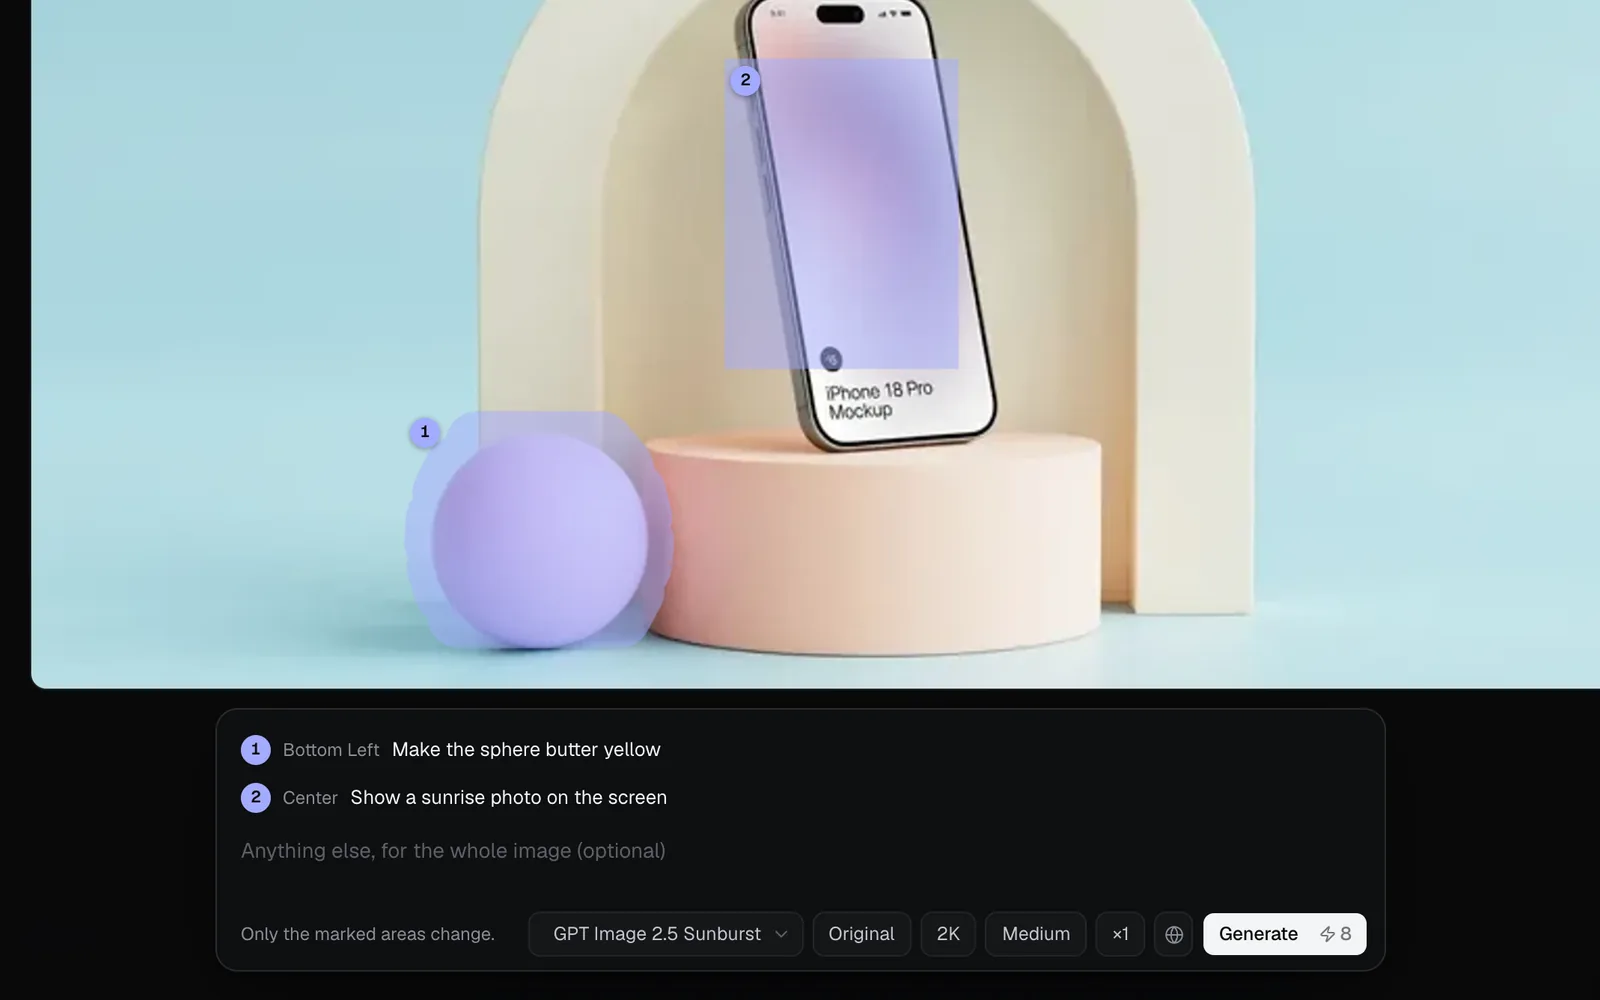
Fil sends the model one prompt: "Change only the marked areas." (on a model that redraws the whole picture, "Make these changes, keeping the rest of the image as it is."), then a line for each zone ("1. Bottom left: Make the sphere butter yellow"), then your words for the whole picture. The new node shows that prompt.
To change the whole picture without marking anything, type the change in the box ("Describe the change, or mark where it goes first") and click Generate. The line beside the chips says "Nothing marked: the whole image is edited."
Choose a model: marked areas or the whole image
The model chip opens a menu headed Edit with. Each model says "marked areas" or "whole image" under its name.
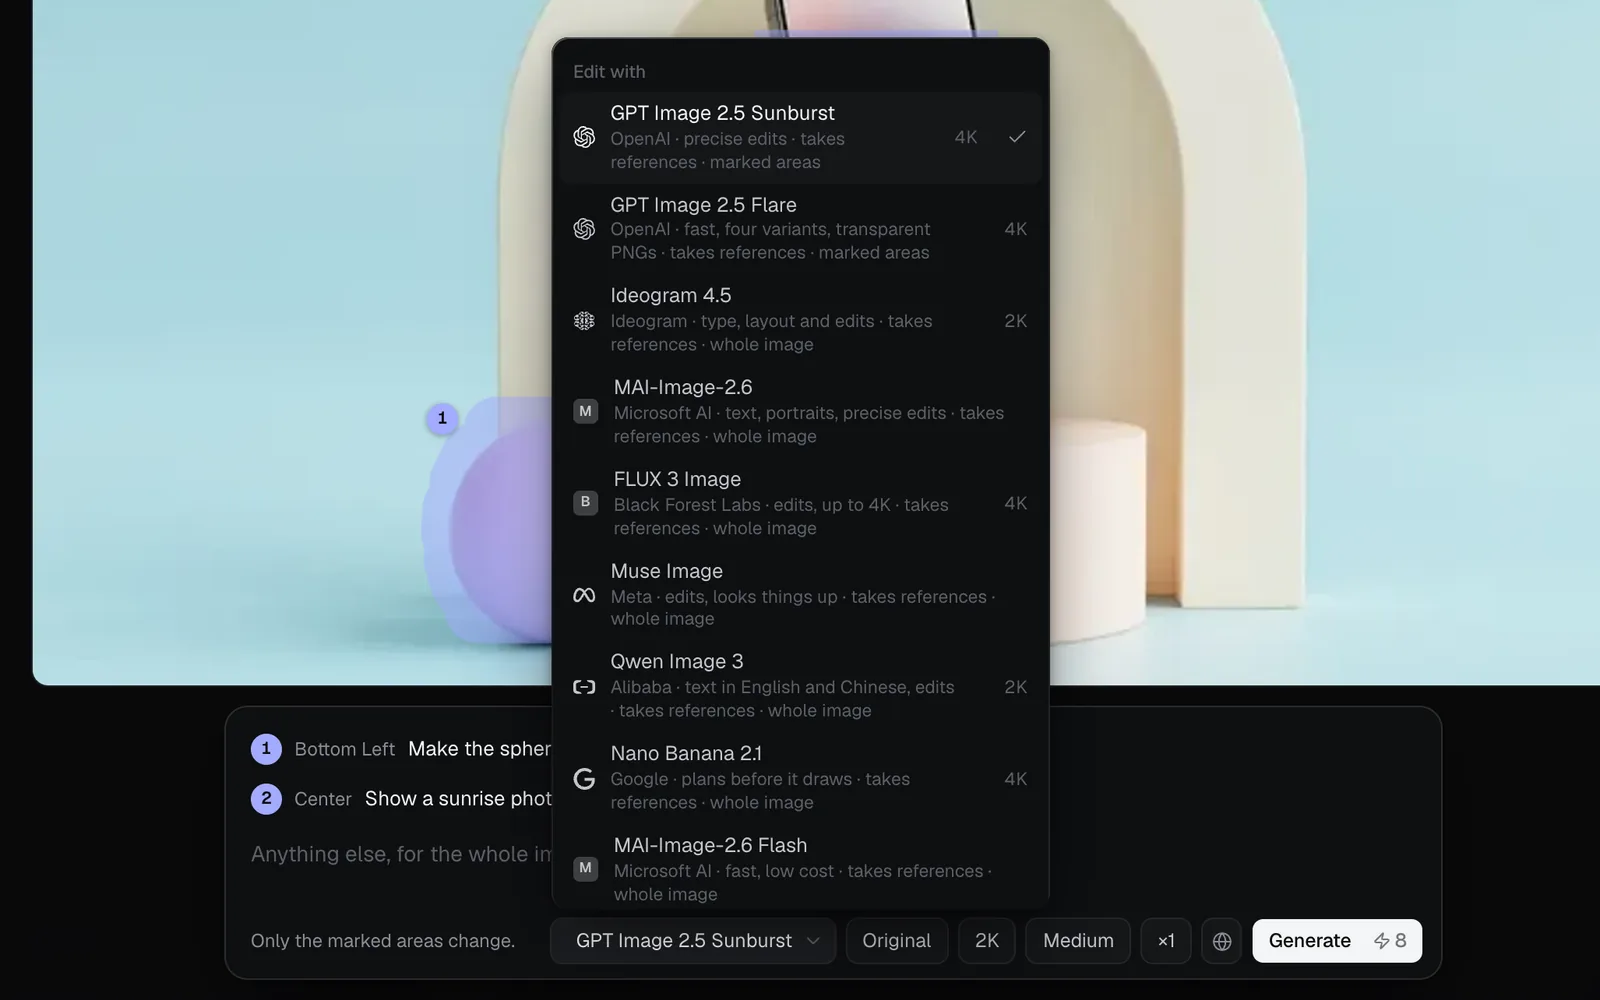
Which to pick:
- GPT Image 2.5 Sunburst, made for precise edits: changes only the marked areas, and keeps the picture's exact shape. Start here.
- GPT Image 2.5 Flare: also keeps to the marked areas, and makes four versions a run to start with. Set Images to ×1 for one.
- Any other model redraws the whole picture from your words, keeping the rest as close as it can. Use one for changes all over, such as a new style or light. With marks, the line says "Nano Banana 2.1 can't use marked areas: the whole image is edited, as described."
The chips after the model offer what that model has:
- Aspect ratio starts on Original, the picture's own shape. Other models than GPT Image 2.5 take the nearest shape they make; its menu says which ("The image's own shape · 16:9").
- Resolution (1K, 2K, 4K), Quality (Low, Medium, High), Images (×1, ×2, ×4) and Effort, where the model has them.
- The globe or lock: whether the edit is public or private. On a canvas it follows the picture's node; see Image editing.
What inpainting costs
The price is on Generate before you start. It's what the model costs to make a picture from one reference, at the settings you pick:
| Model | 16:9 | Square |
|---|---|---|
| GPT Image 2.5 Sunburst | 8 | 12 |
| GPT Image 2.5 Flare, ×4 | 24 | 42 |
| Nano Banana 2.1 | 7 | 7 |
These are at 2K and Medium quality; Nano Banana 2.1 redraws the whole image. On GPT Image 2.5 Sunburst, a 16:9 edit costs:
| Setting | Credits |
|---|---|
| Quality: Low, Medium, High | 3, 8, 24 |
| Resolution: 1K, 2K, 4K | 5, 8, 12 |
| Images: ×1, ×2 | 8, 13 for both |
A run holds the most it can cost and settles at what it used. If it fails, or the model's provider blocks it, its credits come back.
See what you asked for
The edit's node keeps what you asked for. Select it, and the panel on the right shows Asked for: the picture with each zone outlined and numbered in pink, and each change with where it is. In the full view, the same panel sits beside the edit.
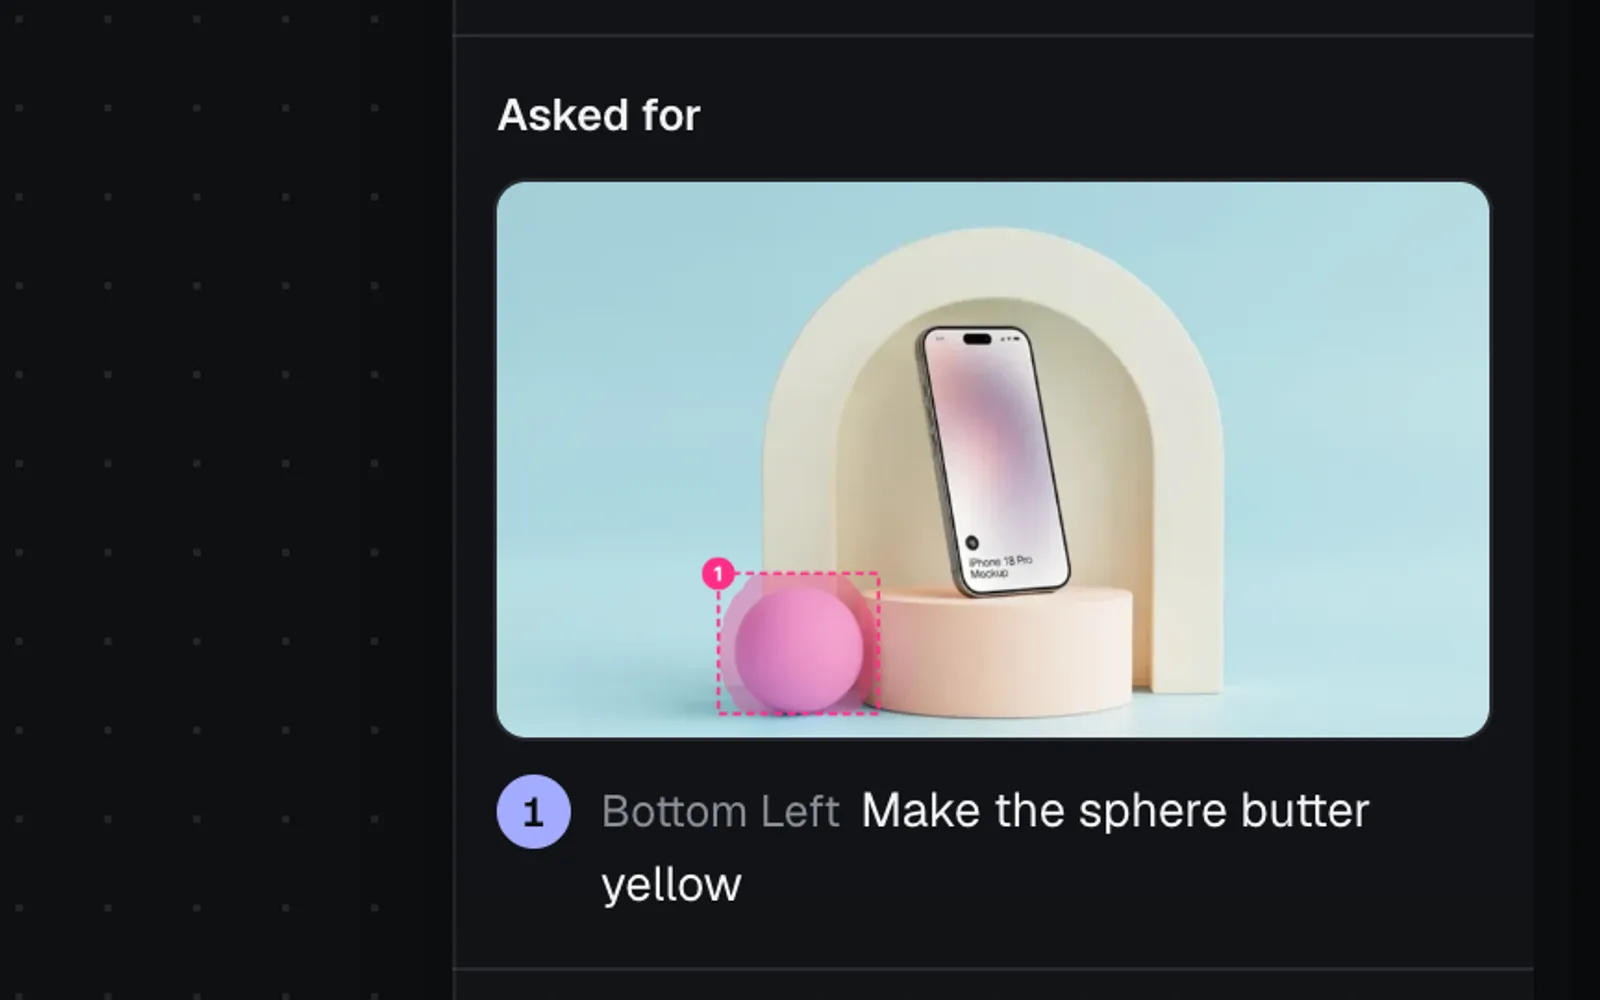
The node keeps the marks too. Click Add on it for another take of the same edit, on the same areas. To change something else, edit the new picture: its Edit menu opens Inpaint on it.
Edit an SVG
An SVG that a Code node made opens with Inpaint alone, and it's edited as code rather than redrawn as a picture. Mark the areas and describe each change as above. The model chip lists the Code models, starting on the one that made the SVG, and the line beside it says what happens, such as "Made again as SVG code with Claude Sonnet 5.5, each change where it's marked."
On a canvas, Generate adds a Code node that makes the new SVG, with the marked copy wired into it as a picture so the model sees where each change goes. Outside a canvas, the new SVG runs at the top of the Code view. See Code generation.
Inpainting keys
| Keys | What they do |
|---|---|
| [, ] | A smaller or larger brush |
| ⌘Z, ⇧⌘Z or ⌘Y | Undo, redo a mark |
| Enter | Keep a zone's change; in the text box, Generate (⇧Enter for a new line) |
| Esc | Close a zone's box, then the full view |
The tools' letter keys are in the table above; they and the bracket keys work while you're not typing in a box.
Tips
- Mark a little more than the object: its shadow and edges change with it.
- One change a zone reads best. For three changes, mark three zones.
- Text in a picture: mark the words, and give the new words in quotes.
- For a big change of style or light all over, skip the marks and use a model that redraws the whole picture.
What's next
- Extend an image (outpaint): make room around a picture and fill it.
- Change the camera angle: see the same scene from another side.
- Upscale and remove the background: finish the edit for print or a page.
- Image editing: every tool, where it works and what it costs.