Transitions, speed and keyframes
Add dissolves, pushes, wipes and 8 more transitions between clips, change a clip's speed, and animate its position, size and opacity with keyframes.
Once the scenes are in order, the video editor's inspector shapes how each one plays: the transition into it from the scene before, its speed, where it sits on the frame and how big it is, a slow camera move, how it comes in and goes out, and keyframes that animate its place, size, turn and opacity over time.
Add a transition between two clips
A transition goes on a cut, where one scene (a video or a picture) ends and the next begins.
- Point at the timeline. A small button shows on each cut, at the top of the scene that starts there; its tip reads "Add a transition".
- Click it. A menu headed Transition opens.
- Pick one, such as Dissolve. The button fills in and stretches to show how long it lasts, and the scene after the cut is selected.
- To change its length, use the seconds beside it in the inspector's Transition in section: 0.6 to start with, from 0.1 to 3.
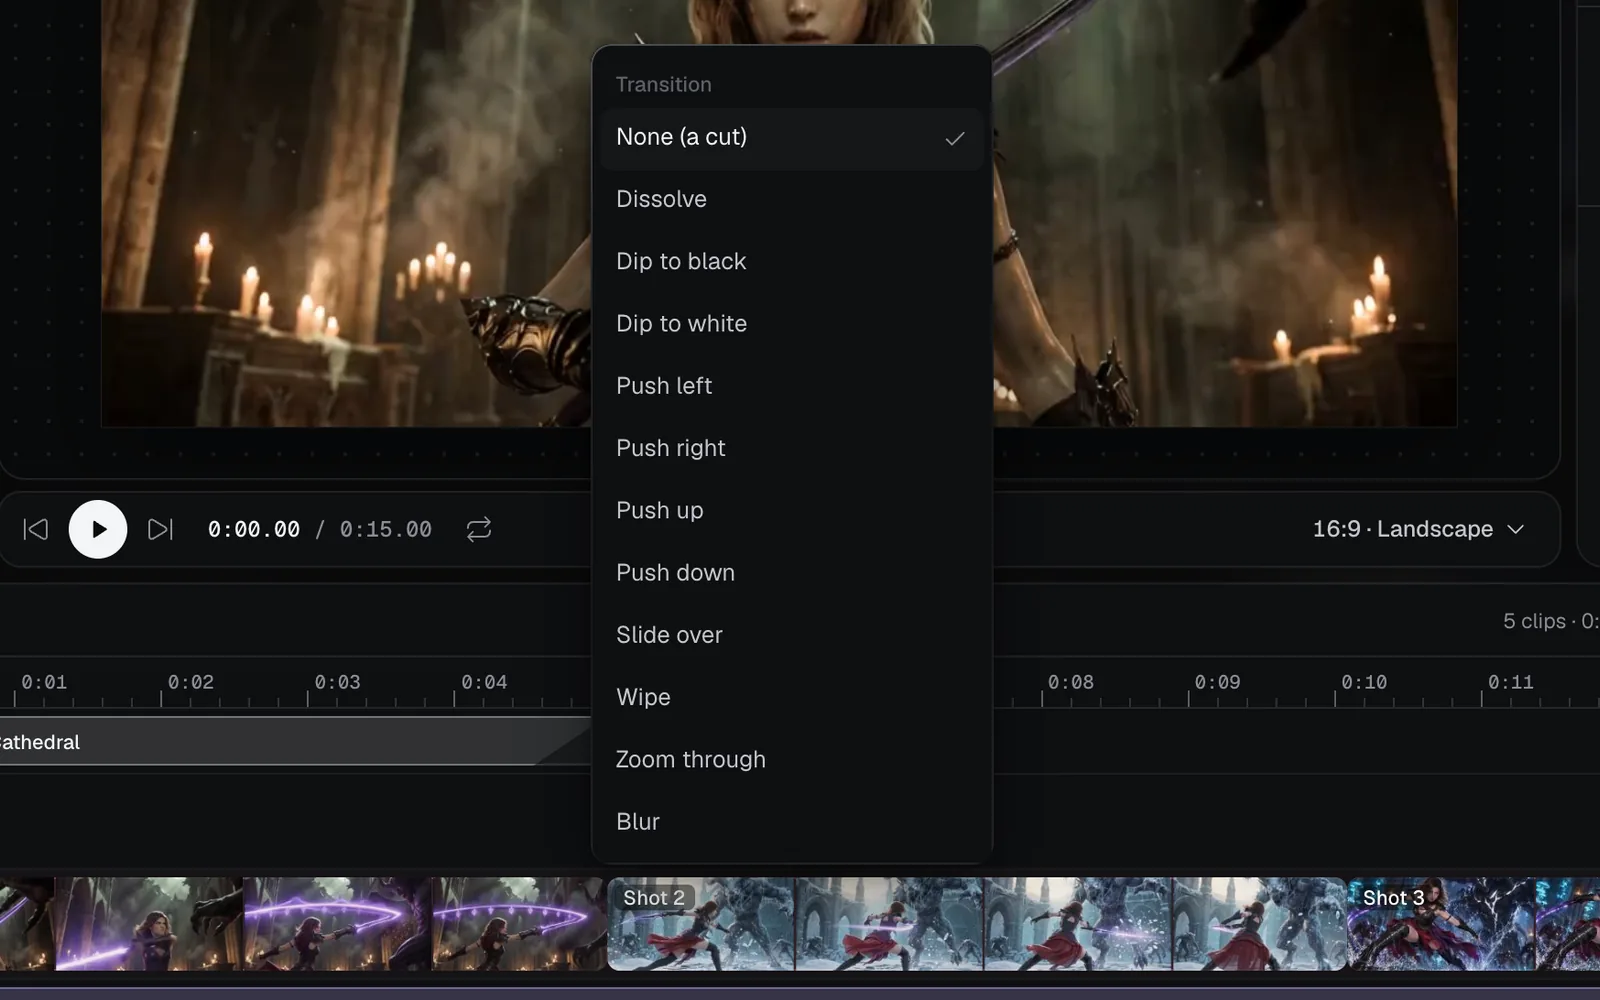
The transition sits in the middle of the cut, half before and half after, so the edit doesn't get longer: the scene going out holds its last frame and the one coming in its first while they overlap. It's never longer than either scene. The scenes can be on different lanes, such as a video going into a picture.
To take a transition off, pick None (a cut) on the cut, or Cut in Transition in. A scene with no scene straight before it can't have one, and its Transition in says "A transition goes between two scenes: put another video or picture straight before this one."
Every transition
| Transition | What you see |
|---|---|
| Dissolve | The new scene fades in over the old one |
| Dip to black | The old scene fades to black, then the new one fades up |
| Dip to white | The same, through white |
| Push left | The new scene comes in from the right and pushes the old one out to the left |
| Push right | From the left, pushing to the right |
| Push up | From below, pushing the old scene out of the top |
| Push down | From above, pushing it out of the bottom |
| Slide over | The new scene slides in from the right, over the old one |
| Wipe | The new scene is uncovered from left to right |
| Zoom through | The old scene zooms in as the new one fades in |
| Blur | The old scene blurs away as the new one comes into focus |
The same transition between every scene
- Select several scenes (⌘A selects everything) and pick one under Transitions in the inspector. It goes into each scene that has one before it ("Into 3 scenes.").
- Or press ⌘K in the editor, type the transition's name and choose, for example, Dissolve between every scene. Cuts between every scene takes them all off.
Change a clip's speed (slow motion and fast forward)
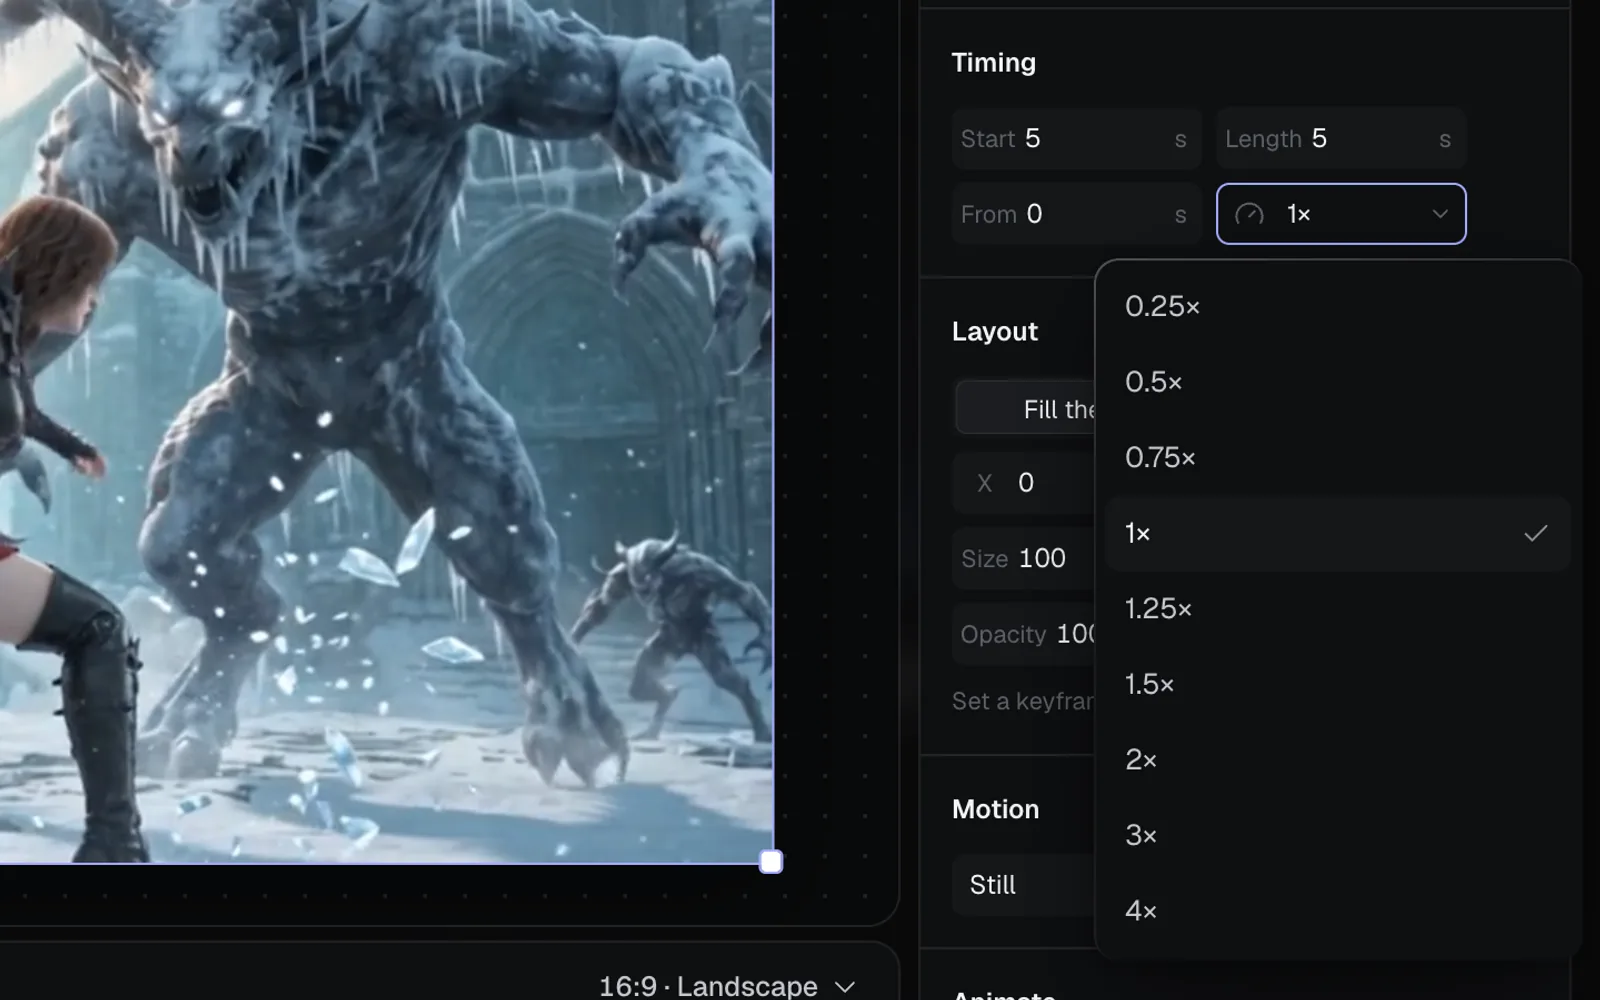
- Select a video or a sound on the timeline.
- In the inspector's Timing, click the speed menu beside From (it shows 1×).
- Pick from 0.25× to 4×.
The same part of the file plays, faster or slower, so the clip gets shorter or longer: a 5-second clip at 2× lasts 2.5 seconds. The clip shows its speed on the timeline (2×). Pictures and words have no speed: change their Length instead.
Fit, position, size and opacity
Select a video, picture or words, and the inspector's Layout section places it on the frame:
| Setting | What it does |
|---|---|
| Fill the frame / Show it all | Videos and pictures: cover the frame, cropping the edges, or show all of it with bars |
| X, Y | How far across and down from the middle, in the frame's pixels |
| Size | 100% fits the frame; from 5% to 1000% |
| Turn | Degrees, clockwise |
| Opacity | 0% to 100% |
Type a value and press Enter, press ↑ or ↓ to step it, or drag a field's name left and right. The arrow at the top right of Layout (Back to as it was) puts all five back, keyframes too.
On the stage, with the clip selected and the edit paused, drag the clip to move it, drag a corner to size it, and drag the round handle above it to turn it (⇧ turns in steps of 15°). It snaps to the frame's middle lines; hold ⌘ to place it freely. A smaller clip on a lane above another plays as picture in picture.
Animate a clip with keyframes
Keyframes animate a clip's X, Y, Size, Turn and Opacity: set a value at one time and another value later, and the editor moves smoothly between them.
- Select the clip and move the playhead to where the move starts.
- Click the diamond beside the setting, such as the first one on the Size row. Its tip reads "Keyframe size here", and it fills in.
- Move the playhead to where the move ends: click the ruler, or press ⇧→ to step a second at a time.
- Change the value: type it in, or drag the clip on the stage. Once a setting has keyframes, any change at the playhead sets a keyframe there.
- Press Space to watch it.
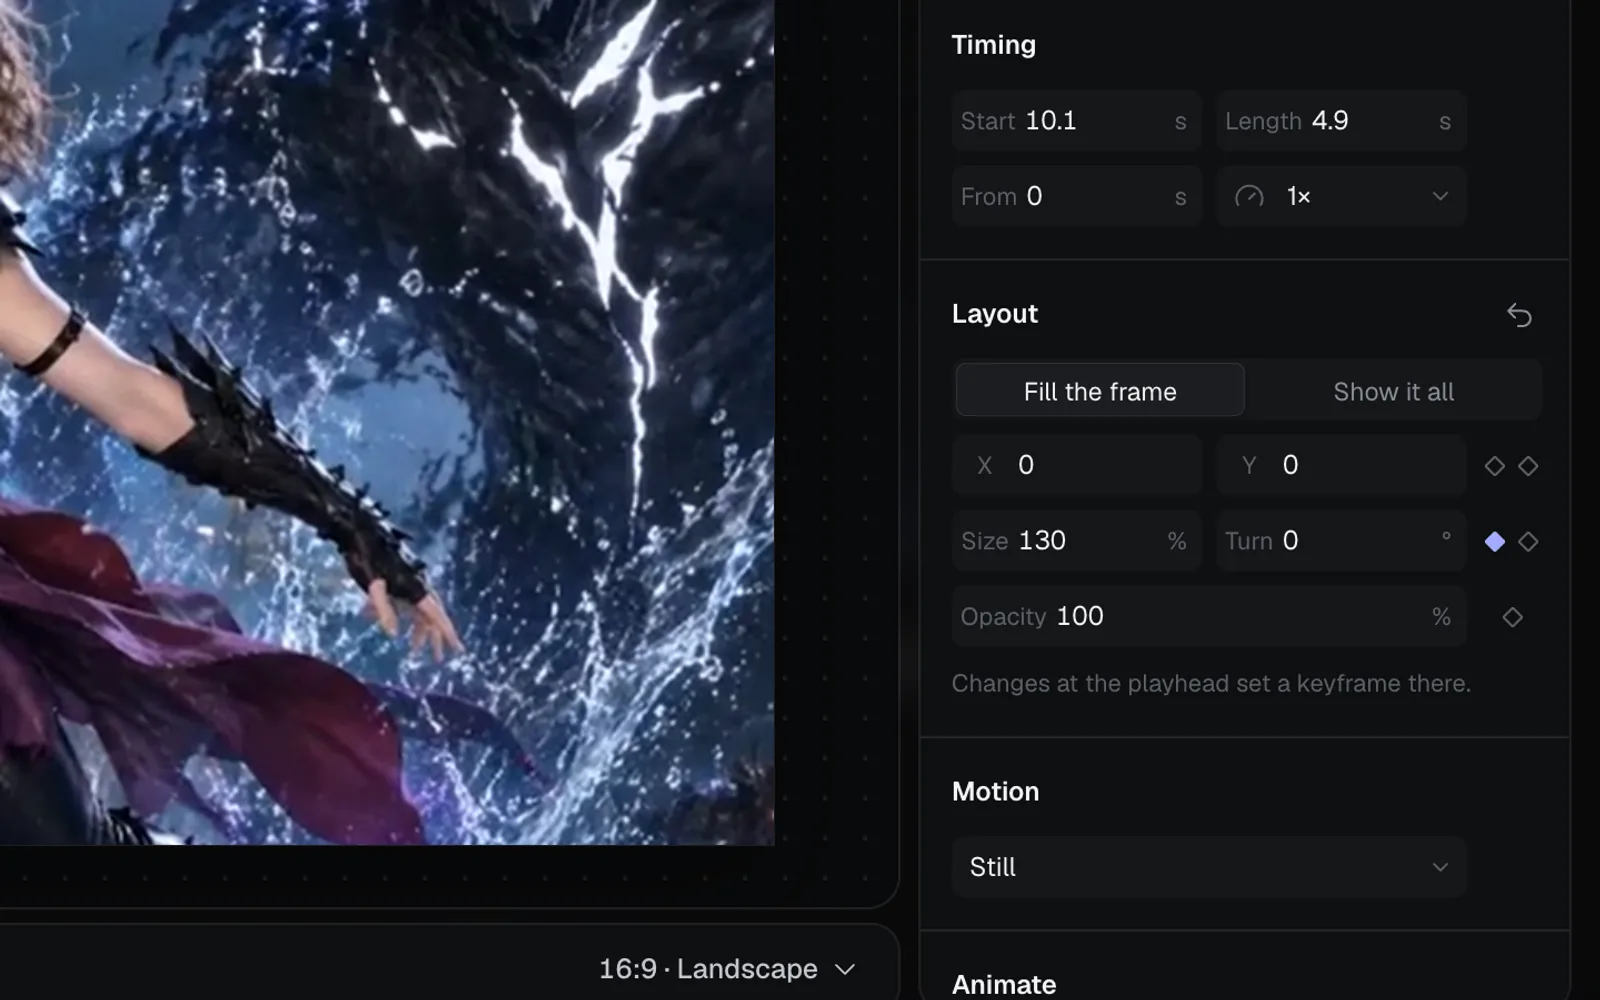
- Each row has a diamond for each of its settings: X and Y, Size and Turn, and Opacity. A filled diamond has a keyframe at the playhead; an outlined coloured one has keyframes elsewhere on the clip.
- The diamonds work while the playhead is over the clip. Otherwise the hint says "Move the playhead over the clip to set keyframes."
- To remove a keyframe, move the playhead onto it and click its filled diamond ("Remove the size keyframe"). When the last one goes, the clip keeps the value it had there.
- The clip shows a small tick on the timeline for each keyframe. Trimming its start leaves them where they are in time, and a split gives each half its own.
- Keyframes ease in and out smoothly. The chat and agents can also make a move linear, ease in only, ease out only, or hold until the next keyframe: see Edit videos with chat, ⌘K and agents.
Slow camera moves (Ken Burns): Motion
Motion gives a video or a picture a slow move while it shows, so a still doesn't sit still:
- Still, Close in, Pull back, Drift left, Drift right, Drift up and Drift down.
- By sets how far, from 1% to 60%: 10% to start with.
Pictures you add start on Close in. Motion works on top of the clip's Layout and keyframes.
Animate in and out: fades, wipes and pops
Animate sets how a video, picture or words come in at the start and go out at the end, each over a time you set (0.5 seconds to start with). On the timeline, a ramp at the clip's ends shows how long they take.
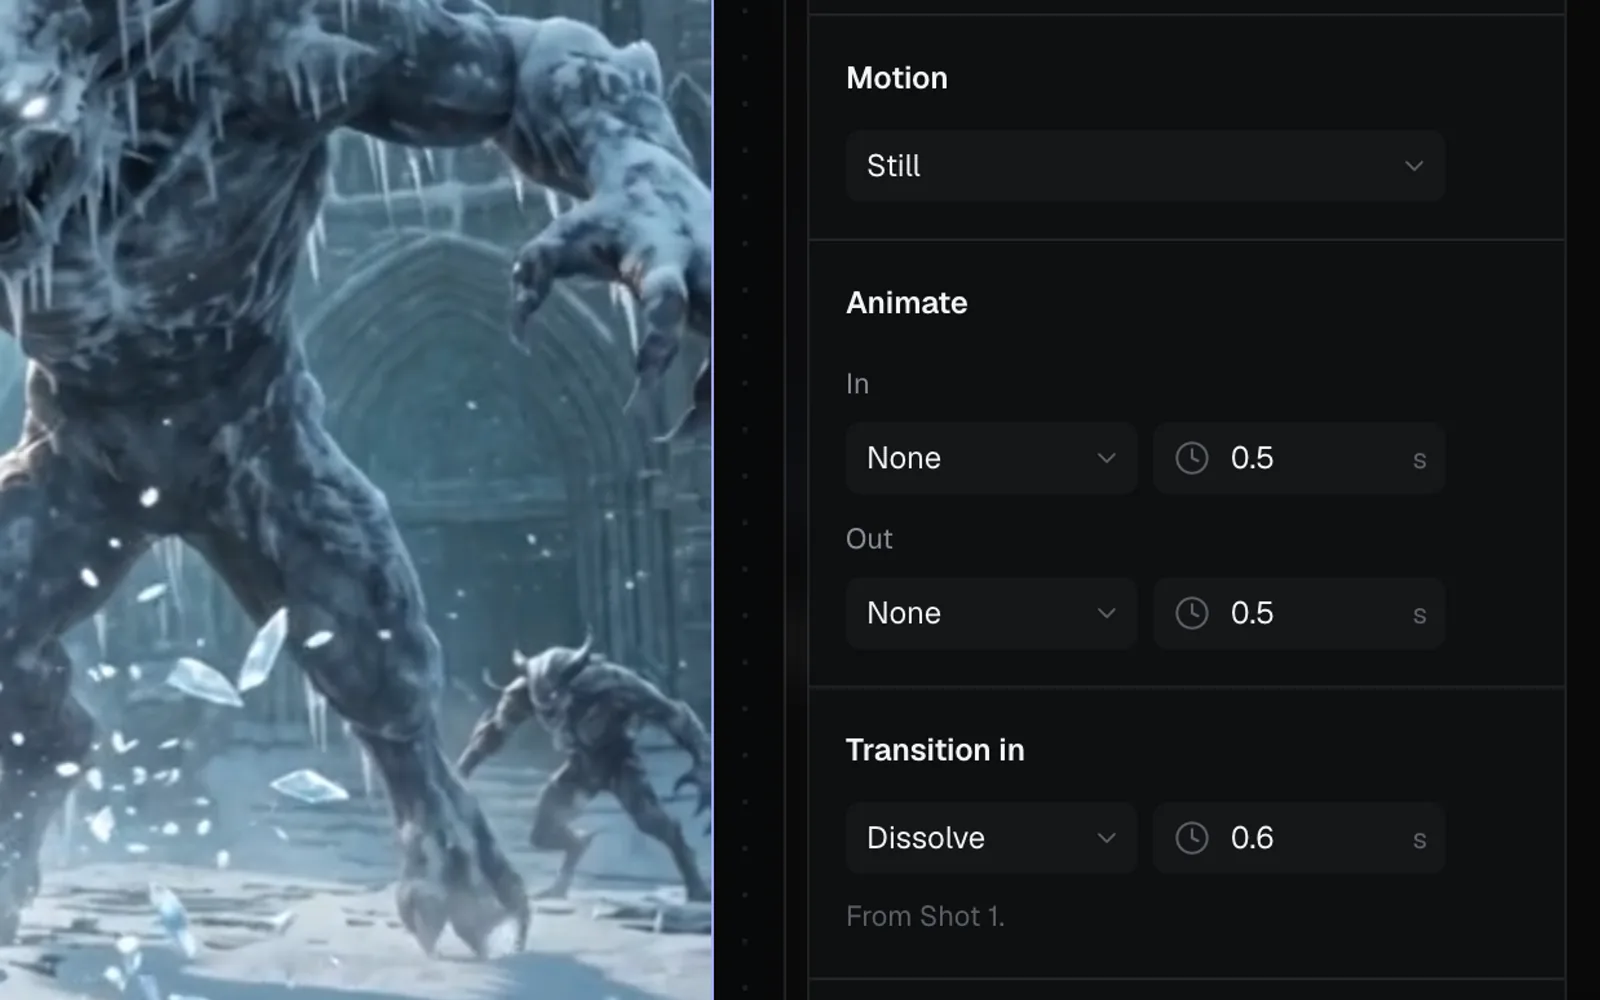
| In | Out |
|---|---|
| Fade | Fade |
| Rise | Rise away |
| Drop in | Fall away |
| From the left | To the left |
| From the right | To the right |
| Pop | Shrink |
| Zoom | Zoom |
| Blur | Blur |
| Wipe | Wipe |
| Typewriter (words) | Untype (words) |
An animation shows the clip over what's below it: the background colour, or a lower lane. Between two scenes, a transition usually reads better: animations suit words, overlays and the first and last scenes. For titles, see Add text and titles.
Settings for several clips at once
Select several clips (drag across them, or ⇧-click) and the inspector shows N clips with:
- Length for each of them. Scenes on a lane close up after a change of length.
- Transitions into each scene that has one before it.
- Animate In and Out for all of them but sounds.
Tips
- Transitions, speed, motion and keyframes cost nothing, and the export draws them exactly as the stage does.
- ⌘Z undoes any of them, and a drag on the stage is one step.
- To check a transition, click the ruler a second before the cut and press Space.
What's next
- Edit the timeline: trim, split and reorder scenes.
- Add text and titles: animated titles and captions.
- Add music, voice and sound: volume and fades for the sound.
- Export and render videos: make the MP4.