Change the camera angle
Change the camera angle of an image with AI. Move a camera round a 3D stage or pick Left, High or Closer, and Seedream 5.0 Pro reshoots the scene from there.
Angle reshoots a picture from another viewpoint: a product from its side, a portrait from above, a room from lower down. You place a camera round your picture on a small 3D stage, and a model makes the new shot, keeping the subject, the setting, the light and the style. The original stays as it was.
Change the camera angle of an image
- On a canvas, hover the picture and click the brush at its top right (its tip reads Edit). The menu is headed Edit.
- The Edit button in the inspector on the right opens the same menu when the node is selected.
- Click Change camera angle. The picture opens full screen on the Edit tab with Angle picked in the rail on the left: the picture stands on a stage with a camera in front of it.
- Move the camera. Click a tile under Around, Height or Distance, or drag the camera on the stage (see below). The line under the tiles says the shot in words, such as "From the right, in profile, at eye level."
- If you like, add anything else to change in Anything else to change (optional): "make it evening light", "add a rug under it".
- Click Generate. The button shows the price: 9 credits on Seedream 5.0 Pro at 2K.
The full view closes, and a new Image node named New angle with a number (New angle 2 here) appears beside the picture, wired from it. It starts at once and shows the new shot when it's done, usually in under a minute. Click Add on that node for another take.
Generate stays grey until the camera has moved or you've typed something: it says "Drag the camera round the picture, or pick a view." Reset puts the camera back in front of the picture.
Move the camera on the 3D stage
The stage shows your picture standing on a floor, seen from a little above. The camera that takes the new shot goes around it on a ring on the floor (Front, Right, Back and Left are marked), up and down an amber arc (Low, Eye level, High and Top-down), and nearer or further. Lines from its lens show how much of the picture it takes in.
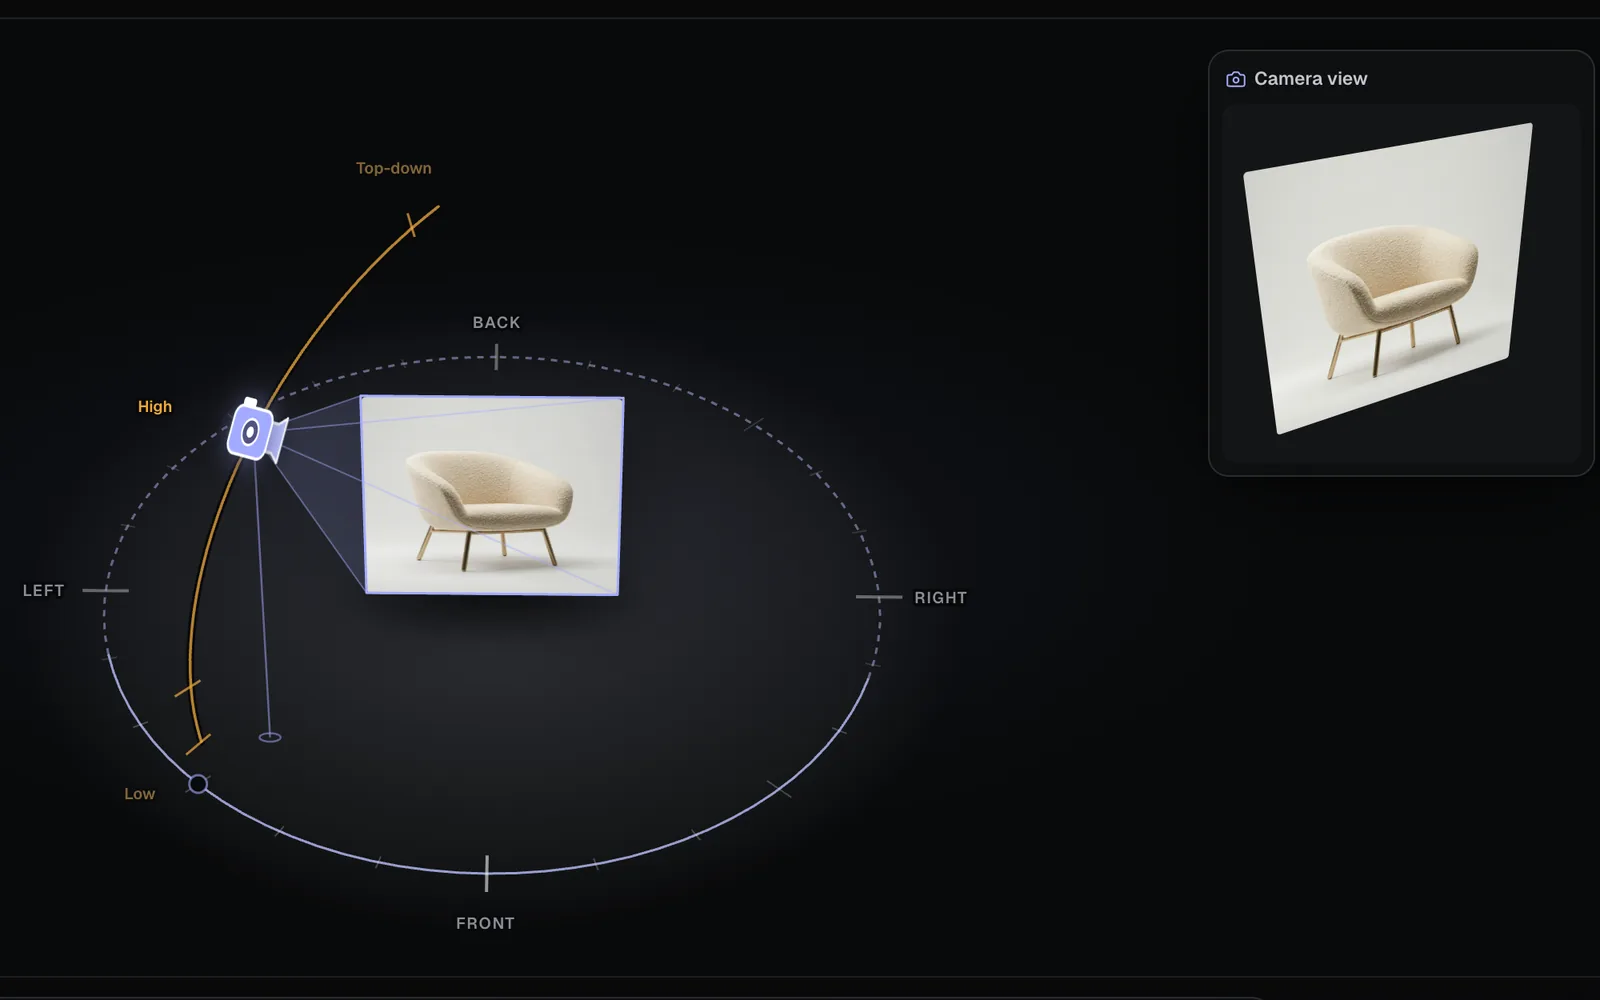
- Drag the camera, its spot on the ring or the arc, and it follows the pointer. A readout above it says where it is, such as "45° left · 25° above".
- Drag anywhere else on the stage to go round and up in 5° steps: right takes the camera round to the right, up takes it higher.
- Scroll on the stage to step nearer or further.
- Arrow keys: click the stage first, then ← and → go round 15°, ↑ and ↓ go up and down 15°.
The camera goes all the way round, and from 45° below the picture to 80° above it.
Camera view, at the top right, shows the picture turned as the new shot will see it. The headings of the tile groups under the stage follow every move too: Around says "45° left", Height "30° above", Distance "Closer".
Pick a view: Around, Height and Distance
The tiles under the stage are quick views. Each group's heading shows where the camera is now, and the tile nearest it lights up.
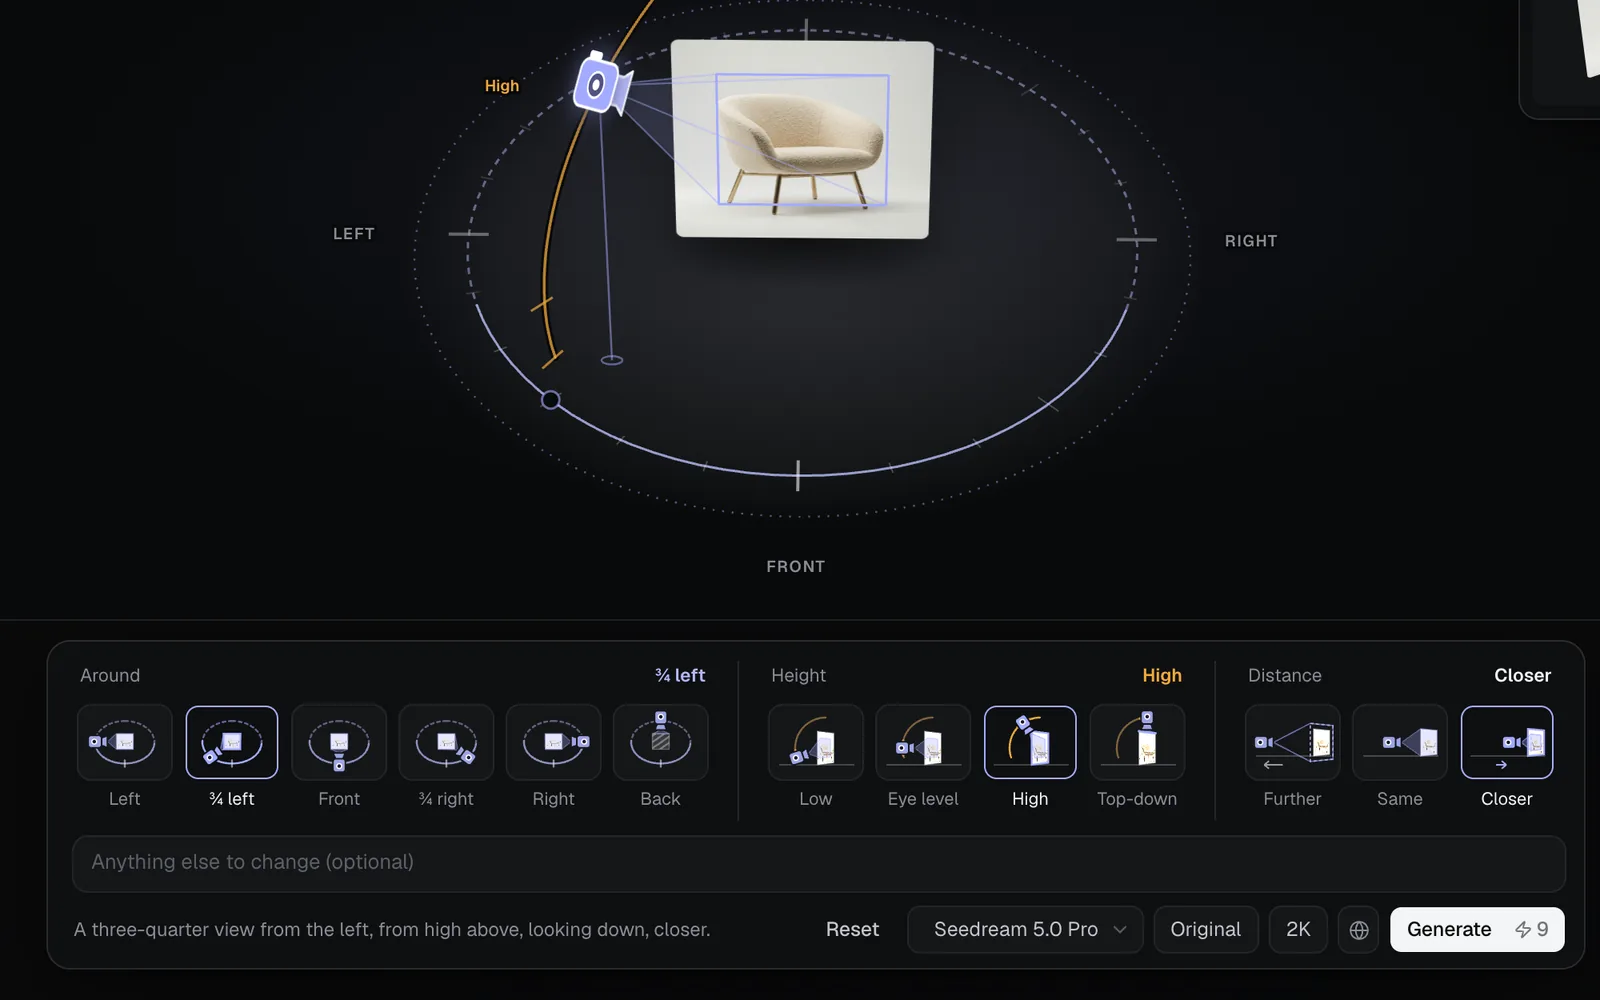
| Group | Tiles | What they do |
|---|---|---|
| Around | Left, ¾ left, Front, ¾ right, Right, Back | Where the camera stands round the subject: 90°, 45° or all the way to its back |
| Height | Low, Eye level, High, Top-down | 30° below, level, 40° above, or 75° above, looking down |
| Distance | Further, Same, Closer | Pulls back to show more of the setting, or moves in so the subject fills the frame |
Mix them: ¾ left with High and Closer is "A three-quarter view from the left, from high above, looking down, closer."
What the model invents for the sides it can't see
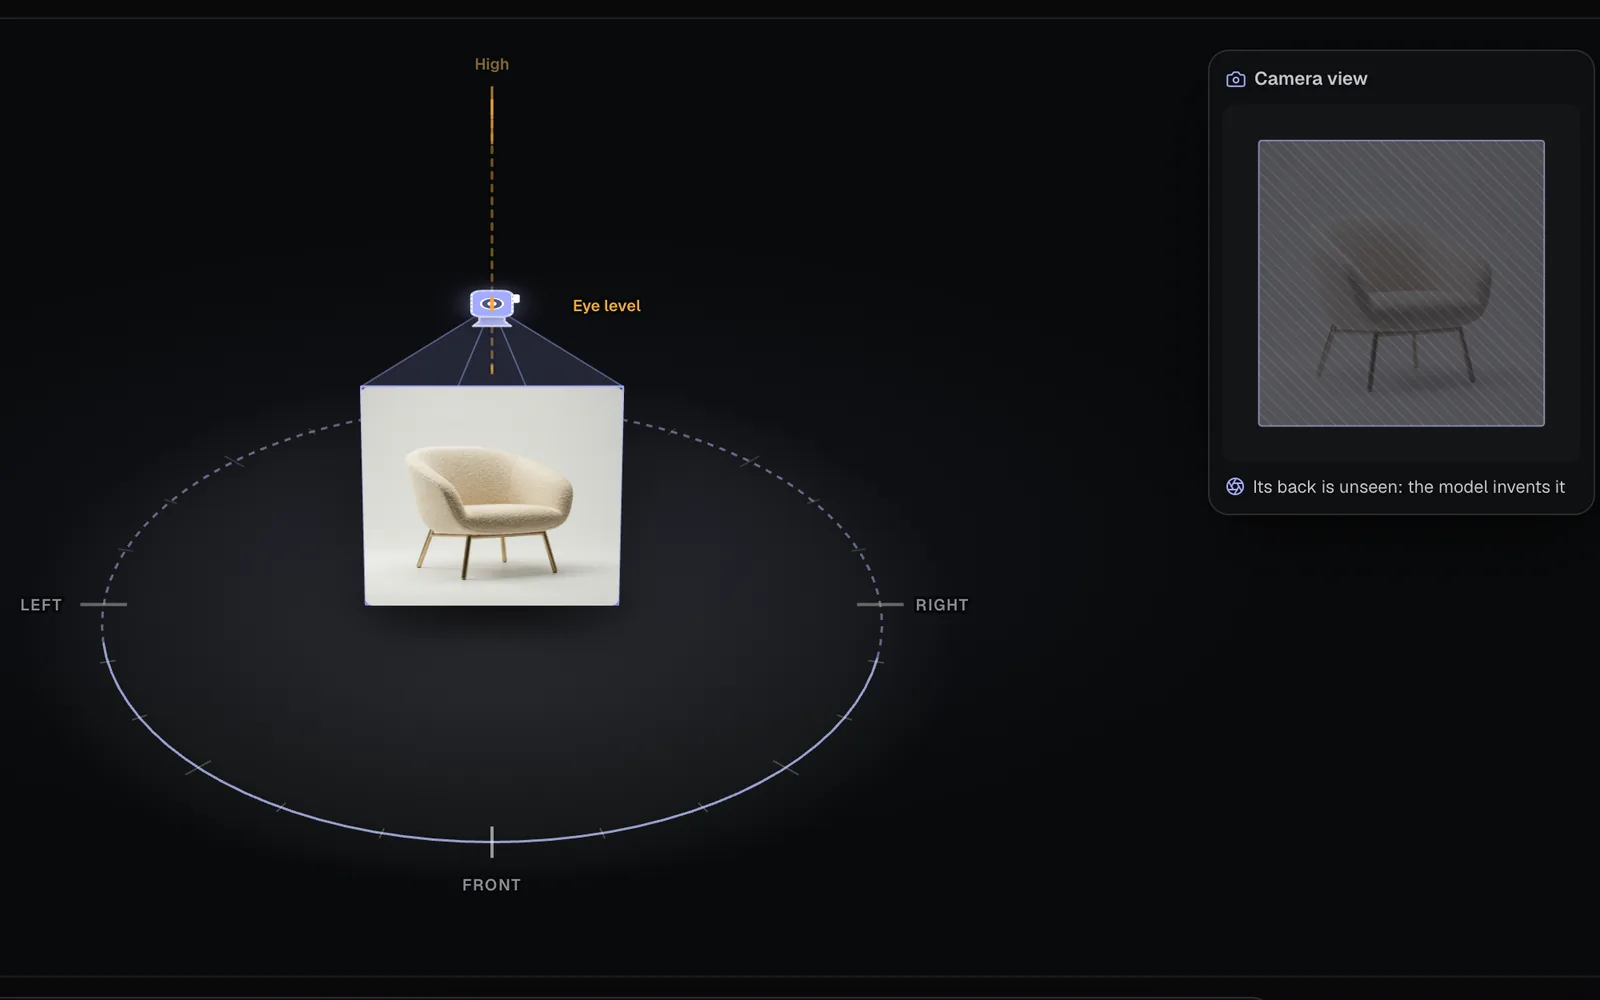
A picture only shows one side of things. When the camera goes round to the side, the model makes up what it couldn't see, guided by the rest of the picture, and the camera view says so: "The model invents the side it can't see". From behind, the camera view shows the picture's back hatched over, with "Its back is unseen: the model invents it".
Fil writes the request for the model for you: which way the camera moved, what that changes (which side of the subject shows, how the perspective and the floor turn, how much of the frame it fills), and what must stay the same (the subject, its clothes and pose, the setting, the light, the colours and the style). What you type in Anything else to change is added at the end. You can read the whole request in the new node's prompt.
Models and prices
Angle starts on Seedream 5.0 Pro, the model that really moves the camera. Change it with the model chip beside Generate (the menu is headed Make with); a model you pick here is used here only and doesn't become the one your other image runs start on.
Which to pick:
- Seedream 5.0 Pro for a new angle. Other image models often hand back the picture much as it was.
- Seedream 5.0 Flash for a quick, cheap try at 2 credits.
- A GPT Image 2.5 model if you want several takes at once: Images sets how many, and each one is charged.
| Model | Credits at 2K | Settings beside it |
|---|---|---|
| Seedream 5.0 Pro | 9 (5 at 1.5K or 1K) | Aspect ratio, Resolution |
| Seedream 5.0 Flash | 2 | Aspect ratio, Resolution |
| Nano Banana 2.1 | 7 | Aspect ratio, Resolution, Images |
| GPT Image 2.5 Sunburst | 12 for a square picture | Aspect ratio, Resolution, Quality, Images |
Prices are for one square picture at 2K. The aspect ratio chip starts on Original, the picture's own shape (its menu says which ratio that is, such as "The image's own shape · 1:1"); pick another to reframe the new shot. Each run holds the most it can cost and settles at what it used. Failed or blocked runs are refunded. See Credits and plans for how credits work.
Change the camera angle outside a canvas
Angle works on any picture you can edit, in the Library and the Image view too:
- Open the picture full size: hover its tile and click the expand icon (View full size).
- Click the Edit tab at the top right, then Angle in the rail on the left.
- Move the camera and click Generate. The new shot runs at the top of the Image view, and a note says "Editing the image. It's at the top of Image."
On a canvas, the new node is public or private as the picture's node is: the globe or lock beside Generate shows which.
Tips and limits
- Simple scenes turn best: one subject on a plain or soft background. A crowded street seen from behind is mostly invented.
- To see the same product from several sides, run Angle once for each view from the original, rather than from a new angle, so each one starts from what's real.
- An SVG made in code has only Inpaint, not Angle.
- For a full turnaround you can rotate and light, make a 3D model instead: see 3D generation.
What's next
- Image editing: every tool in the Edit tab, and where each one works.
- Split an image into a grid: cut a sheet of angles or variations into separate pictures.
- Split an image into layers: lift the subject off its background and move it.
- Video generation: turn the new angle into a clip.