Animate layers into a video
Animate the text and objects in a picture in Fil. Each layer moves from where it started to where you put it; pick the timing and export an MP4, free.
Once a picture is split into layers, the timeline under it turns your edits into a short video: each layer moves from where it started to where you've put it, and layers you added fade in. Pick how they go, one by one or all at once, with an ease or a spring, then export an MP4. It's made in your browser and costs nothing.
Animate an image's layers into an MP4
- Open the picture's layers: on a canvas, click its layer badge, such as 6 layers (its tip reads Open its layers; the count includes the original picture, kept hidden). Or open its Edit menu and click Split into layers.
- Move, resize or turn some layers, and add any new ones (see Split an image into layers). The timeline under the picture plays from where each layer started to where it is now.
- Click Play (the round button at the left of the timeline) to watch it. Drag along the bar between Before ("Where each layer started") and After ("Where each layer is now") to look at any moment.
- Click the button that says how the layers go, such as One by one · Ease out, to change it. A new choice plays at once.
- Click Export MP4, then Download MP4 to save it, or Add to the canvas to put it beside the picture.
Until a layer has moved, Play and Export MP4 wait, and the bar says "Move layers to animate them from where they started."
What moves, and from where
- A layer that's moved, resized, turned, flipped or faded since the split goes from where it was to where it is now, turning about its middle.
- A layer that wasn't there when the picture was split, such as text or an element you added, fades up into place, rising a little as it comes.
- A layer that hasn't changed stays still.
- A hidden layer isn't in the video.

Where each layer starts is where the split put it. To start from your layers as they are now instead, open the timeline, click ⋯ and Start from here ("The layers as they are now become the start"), then move them again.
While a frame of the video shows, the picture says Before or Preview with the time, such as "Preview · 0:01.2", and Edit layers goes back to editing (so does Esc, or a click on the picture).
Choose the animation: one by one or all at once, with easing
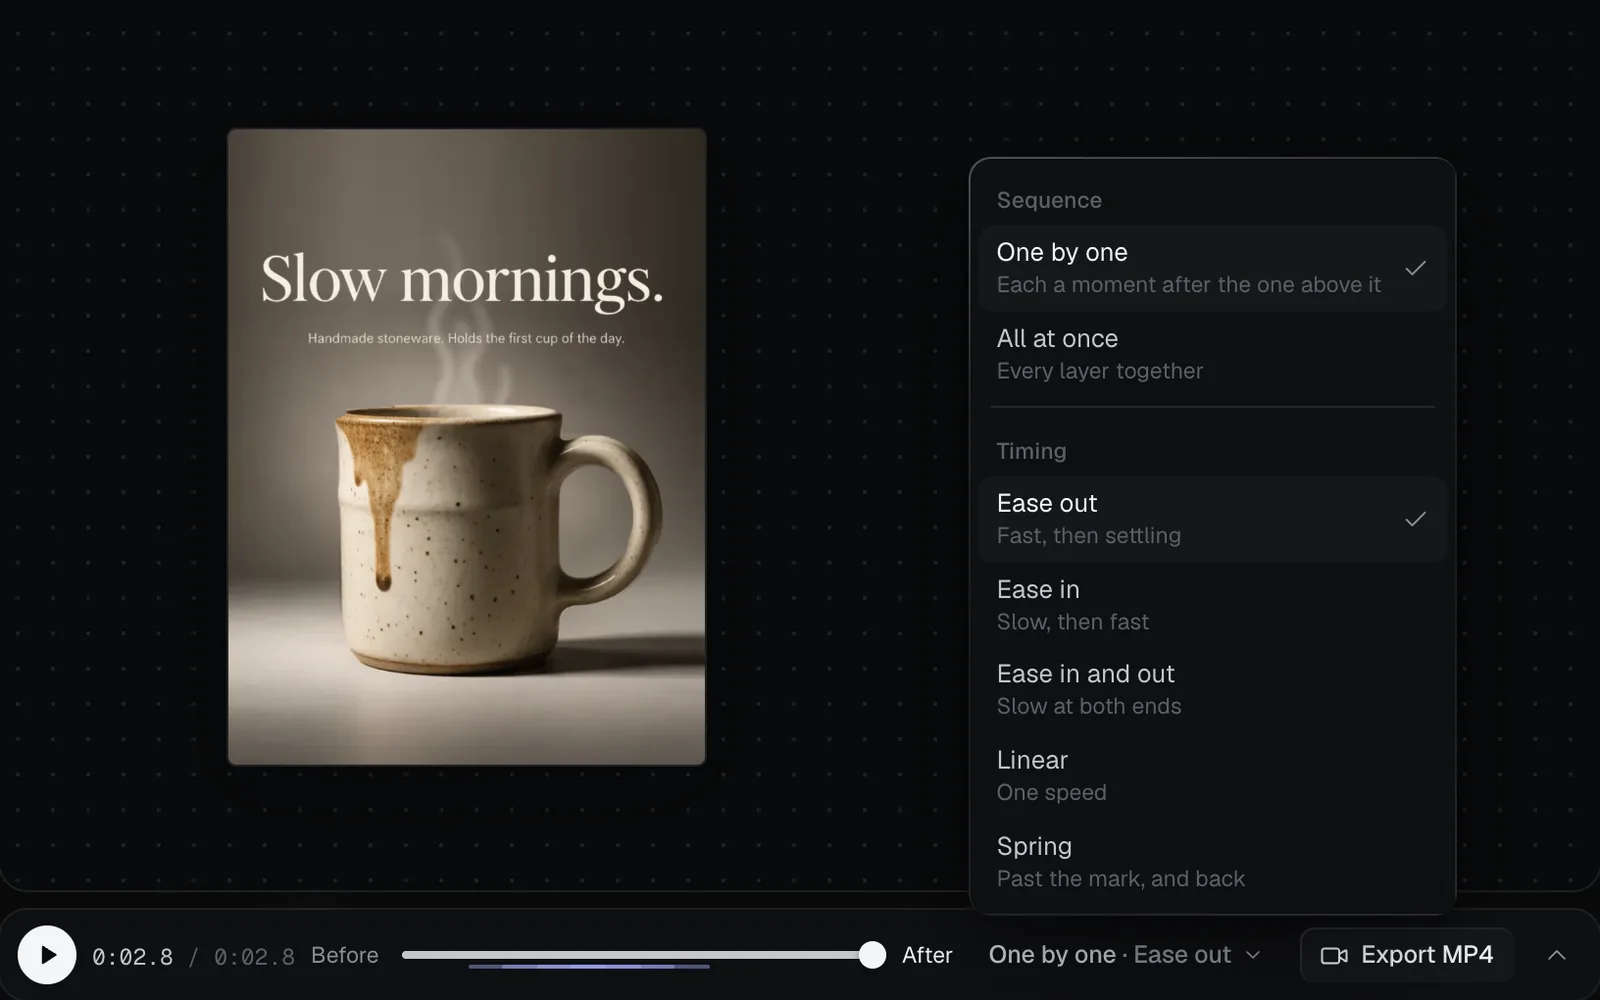
Which to pick:
- One by one · Ease out (where it starts) for a poster or an ad: each layer settles into place a moment after the one above it in the list, so the eye follows them in turn.
- All at once for one move of the whole picture, such as everything growing a little.
- Spring for something playful: each layer goes a little past its place and comes back.
| Choice | What it does |
|---|---|
| One by one | The top layer in the list goes first, each one a moment after the one above it |
| All at once | Every layer moves together |
| Ease out | Fast, then settling (the default) |
| Ease in | Slow, then fast |
| Ease in and out | Slow at both ends |
| Linear | One speed |
| Spring | Past the mark, and back |
To change the order layers go in, change their order in the layers list: one by one follows it from the top.
Set each layer's timing
Click the arrow at the right of the timeline (Each layer’s timing) to open it. It lists every layer beside a ruler of seconds: one that moves or comes in has a bar (point at it and its tip says Moves or Comes in), and one that doesn't change says "Stays".
- Duration (the field with a clock, 0.8 s to start) is how long each layer takes. Delay (the next field, 0.2 s) is the gap between one layer and the next, for one by one only. Point at a field to see its name. Type a number of seconds and press Enter, or press ↑ and ↓ to step by a tenth.
- Drag a bar to change when its layer goes, and drag either end to make it quicker or slower. While you drag, the bar shows its times, such as "0:00.6 – 0:01.8" (or its length, such as "1.20 s", when you drag an end). Bars snap to 0.05 s; hold ⌥ to place them freely.
- Click a bar or a name to pick that layer.
- ⋯ has Start from here and Reset timing, which puts every bar back to the preset. Picking a preset, or changing Duration or Delay, does that too, so set those first and drag bars last.
The video holds still for 0.4 s before the first layer moves and for 1 s after the last one stops, and runs up to 60 seconds.
Export the animation as an MP4
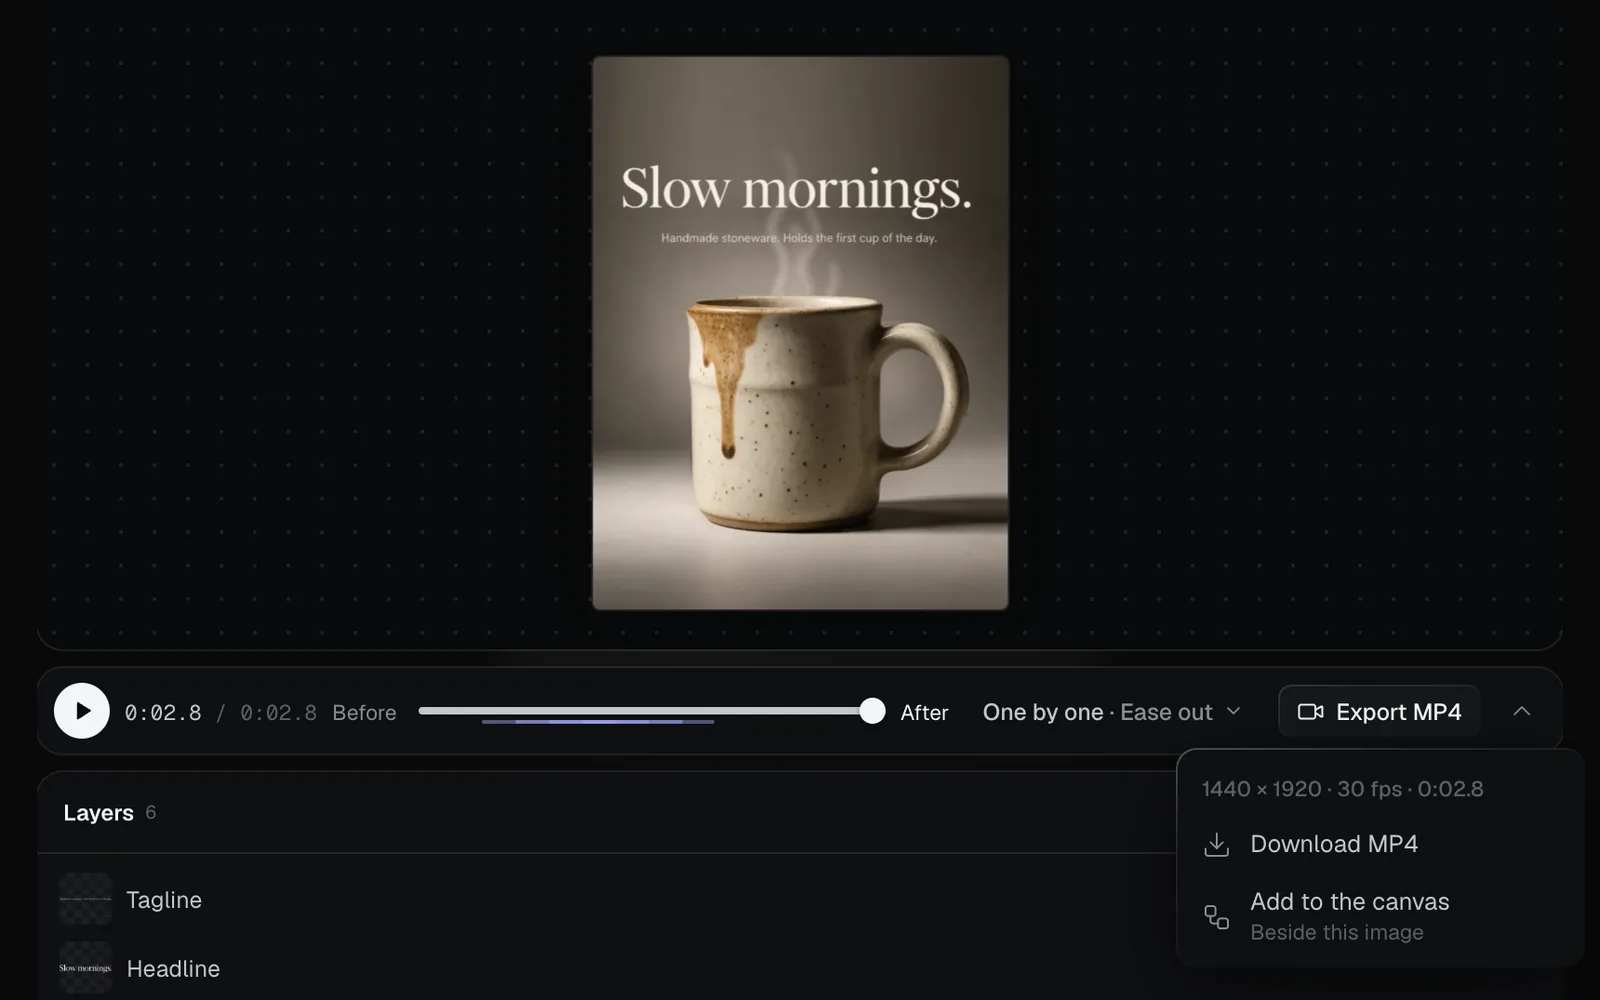
The menu's heading says what you'll get: its size (up to 1920 pixels on the long side, in the picture's shape), 30 frames a second, and its length.
- Download MP4 saves it to your computer.
- Add to the canvas adds it as a video beside the picture, named after it, such as "Slow mornings poster (motion).mp4". It's made small enough to fit your plan's file size: 1 MB on Free, 10 MB on Starter, 50 MB on Pro and 100 MB on Max. If it can't be, Fil says so and asks you to download it instead.
While it's made, the timeline says "Exporting 42%"; the ✕ beside it (its tip reads Stop) stops it. The video is made in your browser, so it uses no credits. Chrome and Safari make MP4s; another browser may only make a WebM, and says so.
Tips and limits
- Small, clear moves read best: a headline sliding down, a product growing a little, a label fading in.
- The video shows the layers as they are; it doesn't redraw them. For motion that a model makes up, such as steam that swirls or a camera that moves, use Video generation with the picture as the start frame.
- The MP4 has no sound. Add music or a voiceover in the video editor.
- Layers, and so the timeline, are on a canvas only.
What's next
- Split an image into layers: split a picture, then move, restyle and add layers.
- The video editor: cut the MP4 together with other clips, music and titles.
- Video generation: animate a picture with a video model.
- Image editing: every tool in the Edit tab.