Material maps to Three.js
A seamless surface and its maps, lit in a Three.js scene you can turn and publish.
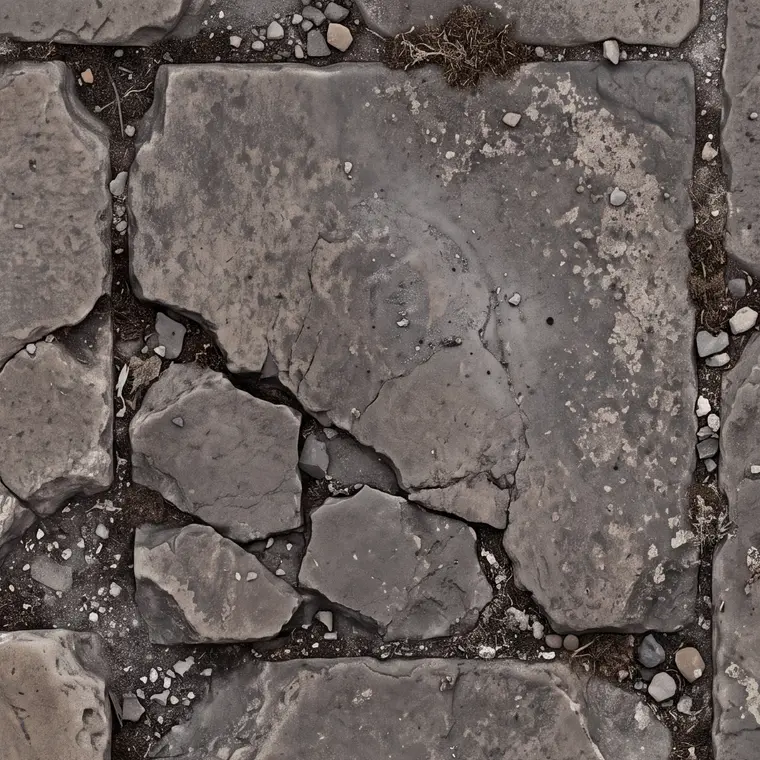
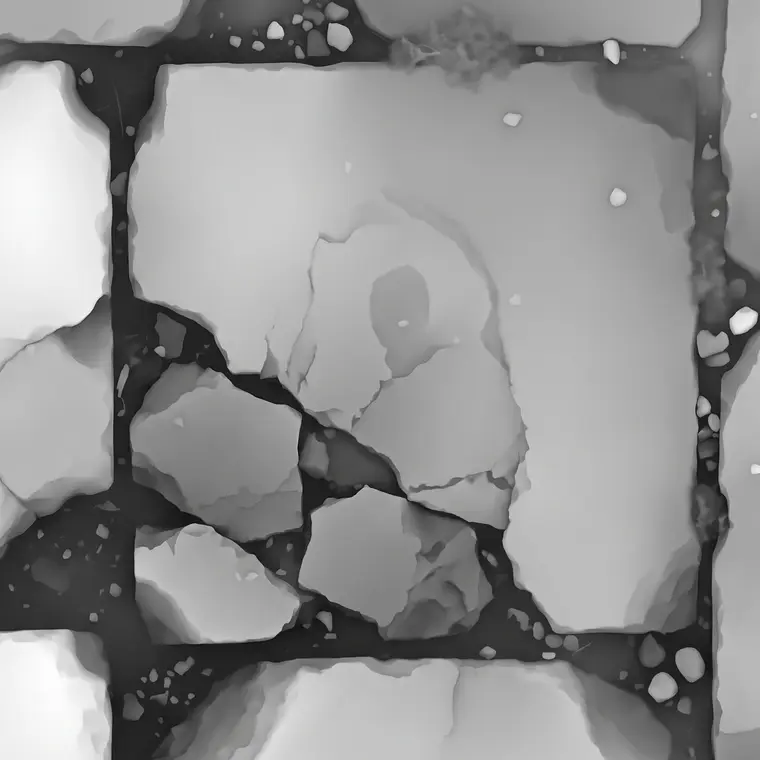
Describe a surface once in Scene.md. A seamless, top-down base colour comes first and the height and roughness maps are drawn from it pixel for pixel; the Three.js scene computes the normal map from the height, puts all four on a surface under moving light, and shows each map on its own at a key press.
Start this workflowWhat it makes
Also makesRoughness mapThree.js scene
4 things in 3 steps. Every example here was made in Fil with this workflow.
How it starts
- Say what you want“Worn cathedral flagstones with ash in the seams, lit by a moving torch at night”, or a picture. Nothing to upload first.
- Pick from a few choicesClaude asks about the surface and its materials, how big it is and how the scene is lit, and tells you if a file is missing.
- Generate allBase colour first, then each next step as soon as what it needs is ready.
What you put in
- Surface photoA straight-down photo of the surface you want: stone, wood, fabric or metal.Optional
- Scene.mdThe surface, its size, the scene, the light and the camera. Claude fills it in from your answers, or you can.Brief
Nothing has to be uploaded to start: the canvas opens with a place for each file, ready when you are.
How it runs
Generate all runs it left to right: each step starts as soon as what feeds it is ready, and you see the whole price first. Or run any step yourself.
Step by step on the canvas
- Generate Base colour and check it: flat, top-down and without shadows.
- Generate Height map and Roughness map from it, so they line up pixel for pixel.
- Generate Three.js scene: it builds the normal map from the height map and lights all four. Press 1 to 5 to see each map, then turn it, edit it or publish it.
Skill
The craft every step follows, written out. It comes with the workflow, and you can change it on the canvas.
Read the skill
Material maps to a Three.js scene
Read first
Scene.md for the surface, its size, the scene, the light and the camera; a surface photo wired in, if there is one.
Base colour (1:1)
- Strictly top-down and orthographic: the camera points straight down, with no perspective, horizon or vignette.
- Flat, even, shadowless light: only the material's own colour, with no baked highlights or cast shadows.
- Seamless: the left edge runs into the right and the top into the bottom, with no single feature that repeats obviously.
- What fills the seams and cracks is exactly what Scene.md says (ash, sand, moss), nothing else.
- Real materials at real sizes from Scene.md (worn limestone flagstones 60 cm across, oak boards 12 cm wide).
Height map (1:1, from the base colour)
- Grayscale and pixel-aligned with the base colour: the highest surfaces white, the lowest black, smooth gradients between.
- Seams, cracks and grooves dark; raised details (pebbles, knots, stitches) light; no colour, light or photo texture.
Normal map (built in the scene, from the height map)
Picture models can't draw a tangent-space normal map accurately, so the scene computes it: read the height map into a canvas, take each pixel's slope with a Sobel filter (strength from Scene.md's surface, about 2 for stone), and write it as an OpenGL normal map (green up, flat areas #8080FF), wrapping at the edges so it tiles.
Roughness map (1:1, from the base colour)
- Grayscale and pixel-aligned: white is matte (dry stone, chalk, ash, fabric), black is glossy (wet patches, polished metal, glaze).
- Broad and calm: roughness changes with the material, not with every speck.
Three.js scene
- The surface as a MeshStandardMaterial: the base colour as map, the computed normal map as normalMap, roughnessMap, and the height map as displacementMap on a finely divided plane, since a normal map changes shading but only displaced vertices change the silhouette. Keep the displacement small (about 2% of a tile's width, bias so the tops stay level): stone stays flat-topped and only the seams sink, never a lumpy crust.
- Keys 1 to 5 show the base colour, height, normal and roughness maps on their own, then the lit surface, with a small label saying which.
- Colour space: only the base colour is sRGB; the height, normal and roughness maps are data, with no colour-space conversion.
- Every map of the material shares one tiling: RepeatWrapping and the same repeat from Scene.md, with mipmaps and anisotropy up to renderer.capabilities.getMaxAnisotropy() for grazing views. If the maps show a seam where they repeat, use MirroredRepeatWrapping on all of them instead.
- Stone, wood, fabric and plaster are not metals: metalness 0, and shine comes from the roughness map, never from raising metalness.
- Tell the attached maps apart by their descriptions (base colour, height, roughness) and load each at its address exactly as listed.
- Light that shows the maps off: one low, raking key light that moves slowly (the torch, sun or lamp from Scene.md) so the normals, seams and roughness catch it, ACES filmic tone mapping (exposure about 1.1).
- Fill, so the whole surface reads: a HemisphereLight (sky and ground colours from Scene.md's light, intensity about 0.8) plus any second light Scene.md names (moonlight as a cool DirectionalLight, about 0.6). Stone outside the key light stays clearly visible, never black; the lit pool is bright without blowing out.
- A light you can see (a torch, a lamp) is a PointLight with a small glowing flame: a THREE.Sprite whose SpriteMaterial uses AdditiveBlending and a soft radial-gradient CanvasTexture (white-yellow core fading to transparent orange), flickering gently in size and intensity. Never a mesh sphere, circle or flat disc.
- Depth: scene.background and FogExp2 in the same dark colour, dense enough that the far floor fades out completely; the floor plane is several times wider than the view and its edge always lies inside the fog, so no line where the floor ends ever shows. A backdrop Scene.md names (arches, walls, trees) is simple geometry in the surface's material, lit by the fill and fading into that fog, never flat black shapes.
- The camera from Scene.md, with OrbitControls kept above the surface.
- Props from Three.js geometry only when Scene.md asks for them: few, smooth (enough segments, bevelled edges), in the same material or a darker take on it, never faceted low-poly blobs.
Avoid
Perspective or light in the maps, maps that don't line up, seams when tiled, colour in the height, normal or roughness maps, a scene lit flat from the front, a scene mostly in black, the floor's edge in view, and a light drawn as a flat disc.
Wired into 4 steps on the canvas, where you can change it.