HTML Demo, a skill for Claude Code, Codex and Cursor
A skill for Claude Code, Codex and Cursor: show your app working on a web page, drawn live in HTML instead of recorded. Every frame is a function of one clock at a fixed 1200 × 750 stage, so it stays sharp, loops, scrubs and stands still for reduced motion.
Install it
Claude Code:
curl -fsSL https://fil.design/skills/html-demo.zip -o /tmp/html-demo.zip && unzip -o /tmp/html-demo.zip -d ~/.claude/skillsCodex:
curl -fsSL https://fil.design/skills/html-demo.zip -o /tmp/html-demo.zip && unzip -o /tmp/html-demo.zip -d ~/.codex/skillsGitHub:
npx degit MengTo/Skills/agent-skills/web-design/html-demo ~/.claude/skills/html-demoOr tell your agent:
Install the HTML Demo skill from https://fil.design/skills/html-demo: unzip https://fil.design/skills/html-demo.zip into your skills folder (~/.claude/skills for Claude Code, ~/.codex/skills for Codex), then read its SKILL.md.The skill’s folder: https://fil.design/skills/html-demo.zip (zip), GitHub, and each file:
- https://fil.design/skills/html-demo/SKILL.md: The mechanism, the workflow, the rules and their failures, the numbers
- https://fil.design/skills/html-demo/references/contract.md: The step contract, the clock and the helpers
- https://fil.design/skills/html-demo/references/film.md: The hero variant: flows from a graph, beats, a measured camera
- https://fil.design/skills/html-demo/references/brief.md: A shared brief for helper agents, one window each
- https://fil.design/skills/html-demo/scripts/StepWindow.jsx: The engine: window, clock, scale, steps bar, pointer
- https://fil.design/skills/html-demo/scripts/step-window.css: The window, the pointer and the steps bar
- https://fil.design/skills/html-demo/scripts/step-window.js: The same engine without React (HTMLDemo.mount)
- https://fil.design/skills/html-demo/scripts/example-steps.jsx: Two steps written against the contract, with a scrubber
- https://fil.design/skills/html-demo/scripts/preview-plugin.mjs: A Vite plugin to preview one window alone
- https://fil.design/skills/html-demo/scripts/shoot.mjs: Playwright frames at chosen seconds, or frozen
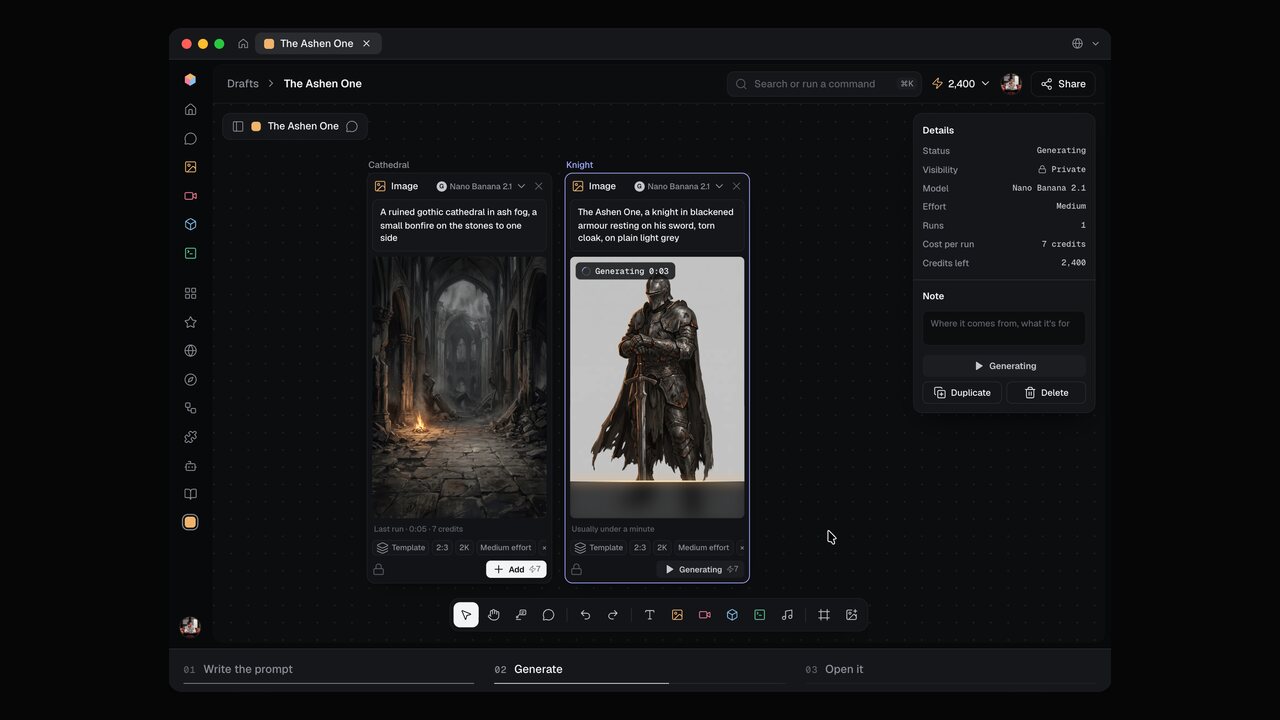
- https://fil.design/skills/html-demo/demo/index.html: A demo with no framework: Fil for Mac making a picture
- https://fil.design/skills/html-demo/demo/PROMPT.md: Prompts to recreate and remix the demo
- https://fil.design/skills/html-demo/demo/preview.jpg: The demo, still
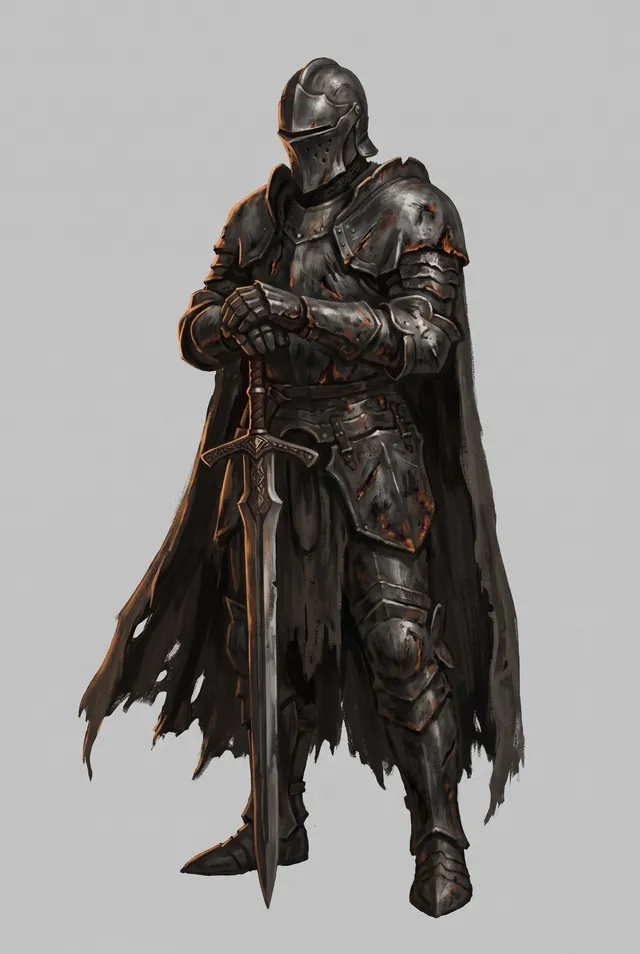
- https://fil.design/skills/html-demo/demo/knight.webp: The Ashen One, as the demo makes him
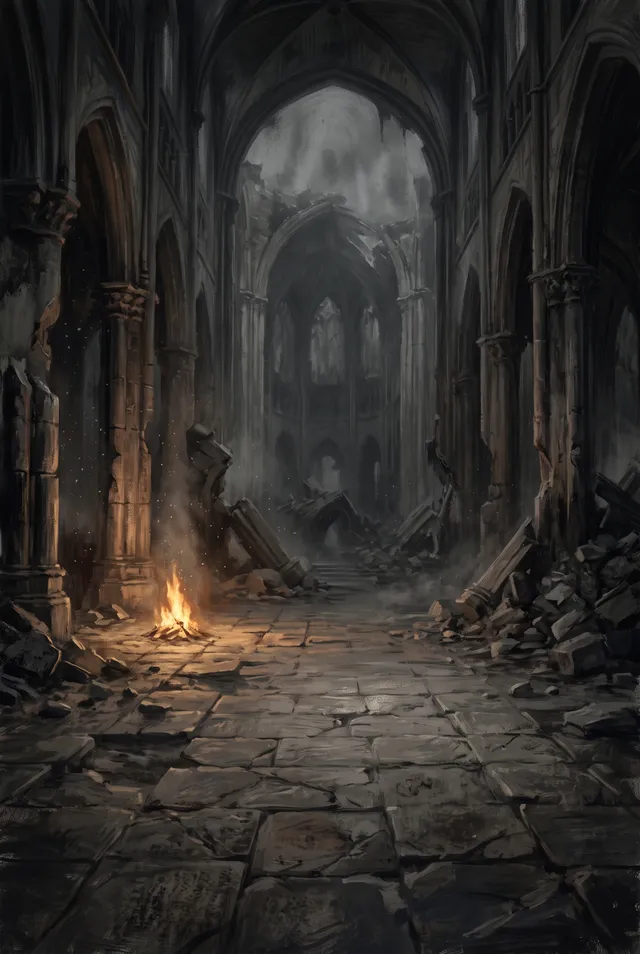
- https://fil.design/skills/html-demo/demo/cathedral.webp: The cathedral the demo starts with
- https://fil.design/skills/html-demo/demo/avatar.webp: The person in the demo
- https://fil.design/skills/html-demo/agents/openai.yaml: Its name and prompt for Codex

SKILL.md
React · DOM/CSS (a vanilla twin is in scripts/step-window.js). No video, canvas, WebGL or screen recording.
It looks recorded, but it's HTML. Each frame is computed, so it stays sharp at any size and pixel density, its words are real text, and it can loop, jump to a step, scrub, freeze for a screenshot and stand still for reduced motion, all from the same code.
Boundary. Use browser-video-recording when you need a real recording of a real browser as an MP4. Use website-to-motion-design when a page becomes a fixed-length film. Use this skill when the deliverable is a live window on a web page that shows an app working.
Provenance. Extracted from fil.design/download (October 2026). There, Fil for Mac's hero window runs four workflows end to end. Eight chapter windows each show one feature step by step: import a URL → Design → the agent; prompt → inpaint → outpaint → layers → angle; record → motion design → edit → transcript; sites; the browser. One lead built the engine and the hero, and one helper agent built each chapter window from a shared brief.
The mechanism
Every frame of the app is a pure function of one number. A step's View({ t }) draws everything inside the window at a fixed 1200 × 750 design size from t alone, where t is seconds into the step. One CSS scale (--k = width / 1200) then fits that stage to the window.
If you take that away, the demo breaks. When state lives in setTimeout chains, animation callbacks or effects, you can't jump to a step. It drifts after a hidden tab, screenshots differ between runs, and reduced motion catches it half-done. Designing responsively inside the window breaks it differently: text reflows at every width, the pointer misses its targets, and phones show a different app.
import StepWindow, { Cursor, ease, typed, glide } from './scripts/StepWindow.jsx';

const ASK = 'The Ashen One, a knight in blackened armour resting on his sword';
function Prompt({ t }) {                           // t: 0 → dur, nothing else
  const text = typed(ASK, t, 0.9, 2.6);            // typed between 0.9 s and 2.6 s
  const made = ease(t, 3.4, 5.2);                  // the picture draws in
  const c = glide(t, [[0, 0, 900, 600], [0.2, 0.8, 520, 330], [2.8, 3.3, 760, 470]], [0.85, 3.35]);
  return (<>
    <App prompt={text} reveal={made} />            {/* the app's real markup at 1200 × 750 */}
    <Cursor {...c} />                              {/* last, over everything */}
  </>);
}
export const STEPS = [
  { id: 'prompt', name: 'Prompt', dur: 6, View: Prompt },
  // 3–5 steps, 4–8 s each
];
<StepWindow steps={STEPS} tabs={['The Ashen One']} label="Make a picture" />scripts/StepWindow.jsx provides the window, its clock (useStepClock), the scaling, the steps bar, Cursor, and the helpers ease, typed, cue, held and glide. references/contract.md has the full API, and references/film.md covers the hero variant (many flows, a camera, beats).
Workflow
- Pick one example and use it everywhere. Choose one believable subject you own, such as a product, a character or a site (Fil used The Ashen One and Ashgrove), and run every window on it. Never show a client's, partner's or real person's canvas. A window full of real names you can't show is unusable, and different subjects in every window read as scraps.
- Gather references of the real UI before drawing anything. Use screenshots, the docs' recordings (pull frames with
ffmpeg -ss 2 -i in.mp4 -frames:v 1 out.png) and the app's source code. List the references for each step. Copy every label, menu item, toast and cost from the source with grep, never from memory. If a viewer who knows the app spots one invented word ("Processing…"), they stop believing the rest. - Script the steps on paper. A window gets 3–5 steps of 4–8 s, 18–30 s in all. Each step gets a beat to see the start (0.3–1 s), the action, the result appearing the way the app shows it (a working state, then the result), and at least 1 s holding on the result. Name the steps as the bar shows them, in 1–3 words ("Paste a link", "Inpaint").
- Write each step as named times, then derive state from
t. Use constants likeTYPE_FROM = 1.9, SEND_AT = 4.3, DONE_AT = 6.9, then comparisons (t >= SEND_AT),ease(t, a, b)for anything that moves,typed()for typing andcue()for lists of changes. Keep times as constants at the top so the choreography reads like a script and can be retimed in one place. - Draw the app at 1200 × 750 from those states. Reuse the real app's markup and CSS where you can. Otherwise copy sizes from its stylesheet: rail width, top bar height, radii, type sizes. Prefix every class and
@keyframeswith the window's own prefix (ximp-,xpic-) and grep to confirm nobody else uses it. - Choreograph the pointer like a person. It arrives 0.3–0.6 s before a click, presses for 0.15–0.2 s, and glides 0.5–0.9 s between targets. Between actions it rests out of the way, and it fades when the viewer should look at the result. It must aim at real elements (
data-aimmeasured from the DOM, or coordinates checked in a screenshot). - Shoot, compare, fix: at least three rounds. Take frames every 0.5–1 s through each step (
scripts/shoot.mjs) and put them side by side with the references. Ask: would someone who uses this app believe it's a recording? Fix structure (layout, sizes, wording) before polish (motion). - Check the edges. Look at the reduced-motion end frames, phone widths (390 px and 340 px), a hidden tab coming back, and the console.
Rules, each with the failure it prevents
- Draw from
talone; let CSS transitions only smooth between states. A transition depends on the frame before it. So anything that must be exact when scrubbing, frozen or shot (progress, typed text, reveals, counters, the camera's target) comes fromt. Transitions are fine for hovers, panel slides and the pointer's glide. The trade-off: after a scrub, those transitions settle late, by up to their own duration. Useglide()when the pointer must be exact too. - Fixed stage, one scale. Design at 1200 × 750 (16:10, the window's view
aspect-ratio) and scale the whole stage withtransform: scale(var(--k))from aResizeObserver, withtransform-origin: 0 0. A responsive layout inside the window moves the pointer's targets, and the app looks different on every device. - Results appear the way the app shows them. Show a working state (spinner, "Making…", shimmer, marching threads), then the result, then a settle. Fil's picture draws in from the top:
clip-path: inset(0 0 100% 0)→inset(0)under a 2 px warm scan line, over a dim copy of itself (blur(10px) brightness(0.5) saturate(0.4), scaled 1.08). Then it settles frombrightness(1.35) saturate(1.1)over 0.9 s, with a glint. A result that just pops in reads as a slideshow. - Use real results and real words. Show output the app actually made, saved next to the page. Don't use stand-ins or lorem. If a step needs a result you don't have, make it in the real app, and ask the owner about any cost first. Made-up results are the first thing people notice.
- Compress time honestly. A run of minutes plays in seconds, but the numbers stay true. Fil's hero shows 18 s for every demo second ("Made 5 things in 2:14"), and the credit balance runs down as each step finishes.
- Play only when it can be seen. Use an
IntersectionObserver(threshold 0.3 for a window, 0.15 for a big hero), skip ticks whiledocument.hidden, clampdtto 0.25 s, and tick every 40–50 ms. Re-render only when the frame's signature changes; the hero comparesJSON.stringify(frame). Videos inside play and pause with visibility. Without this, a page of eight windows burns CPU off screen, and a returning tab fast-forwards through a whole step. - Reduced motion means designed end frames. Under
prefers-reduced-motion: reduce, show each step att = dur, turn off every animation and transition on the stage, and keep the steps bar working (a click shows that step's end). So write every end frame as a complete, good picture on its own. A half-made frame or a blank window is the failure. - One prefix per window, for classes and keyframes alike. Two windows that each define
.cardor@keyframes incollide, and the stylesheet loaded last restyles the other window. You only see it on the page that loads both. - Measure targets from the DOM in a layout effect. Don't hard-code them. Find the pointer's aim (
[data-aim="headline"]) and the camera's frame (the focused nodes'offsetLeft/Top) after layout, and divide by--k. Hard-coded coordinates drift the first time a font loads or a label changes. - Key the camera to the scene it was measured on. In a film with several canvases, store the camera transform together with its scene index, and apply it only to that scene. Otherwise the next scene starts from the last one's transform and swoops across the stage.
- Crossfade scenes with a lagging view. When the scene changes, keep drawing the last frame of the old scene until its 300 ms fade-out ends, then show the new one. Key the stage by step id so each step gets a 0.45 s fade-in. Without the lag, the new scene flashes through the old scene's fade.
- Load the real fonts inside the demo. A page drawn inside the window (a landing page, a site) loads its own web fonts once, with a
<link id="…">added if missing. Fallback metrics change line breaks, so the pointer's aims miss. - Preload the next scene's pictures (
new Image().src = …) while the current one plays. Otherwise the next scene starts with empty boxes on a cold cache. - Mark it as a picture for assistive tech. Give the stage
role="img"and anaria-labelthat lists the steps, and keeppointer-events: noneanduser-select: noneon the stage. The steps bar uses real buttons witharia-current="step"and a visible focus ring. A screen reader should hear "Import a page: Paste a link, Open in Design, Edit with the agent", not 400 nodes of fake UI. <figure>needsmargin: 0. The browser's default 40 px side margins take 80 px off a 390 px phone.
Numbers that shipped
| what | value |
|---|---|
| stage | 1200 × 750, --k = clientWidth / 1200 |
| steps | 3–5 per window, 4–8 s each, 18–30 s per window |
| hold on the result | ≥ 1 s |
| typing | ~50 characters/s (90 characters in 1.8 s); a person reads it, nobody waits for it |
| pointer glide | 0.5–0.9 s, cubic-bezier(0.55, 0, 0.25, 1); arrive 0.3–0.6 s early |
| click | 0.15–0.2 s pressed; arrow scale 1.15 → 0.98 |
| step fade-in | 0.45 s, cubic-bezier(0.2, 0.7, 0.1, 1) |
| scene crossfade | 300 ms lag before the next scene draws |
| clock | tick 40 ms (windows) or 50 ms (film); dt ≤ 0.25 s; on-screen threshold 0.3 (0.15 hero) |
| threads | 1.6 px at 0.8 opacity in the source node's colour; live: dashes 6 7 marching 0.7 s; quiet (brief, skill): 0.14 |
| camera | up to 1.2× on the step being made plus what feeds it; whole canvas 0.86–1.08×; glide 1.3 s cubic-bezier(0.45, 0, 0.2, 1) |
| time shown | 18 s of app time for every demo second |
Many windows at once
Build the engine and one window yourself first. That window is the style guide. Then give each helper one window and a shared brief (references/brief.md). Each helper creates only its two files with its own prefix, previews through one shared dev server (scripts/preview-plugin.mjs, at /preview?entry=), works in its own scratch folder and runs no git. Each one shoots, critiques and fixes for at least three rounds, then reports its steps, screenshot paths and "what still falls short".
Read those reports: the gaps they list are the next round. Helpers stop at usage limits. Resume them with a message rather than starting new ones, because their work so far is kept.
Verify
- [ ] A frozen frame (
useStepClock(steps, { start: { i, t } })) at the sametlooks the same on every run. - [ ] Every step was shot every 0.5–1 s and compared side by side with the real app's references.
- [ ] Every label, menu item and number in the UI was found in the app's source or a reference.
- [ ] Reduced motion shows complete end frames, and the steps bar still works.
- [ ] It pauses off screen and in a hidden tab, and doesn't fast-forward when it comes back.
- [ ] At 390 px and 340 px there's no sideways scroll, and the window keeps its 16:10.
- [ ] Classes and keyframes use the window's prefix only (checked with grep).
- [ ] The console is clean.
Files
scripts/StepWindow.jsx,scripts/step-window.css: the engine (React): window, clock, scale, steps bar, pointer, helpers.scripts/step-window.js: the same engine without React (HTMLDemo.mount), using the same CSS.scripts/example-steps.jsx: three steps written against the contract (prompt → generate → full view).scripts/preview-plugin.mjs: a Vite plugin that serves/preview?entry=<file>so each window can be previewed alone.scripts/shoot.mjs: Playwright screenshots at chosen seconds, or frozen frames, at 2×.references/contract.md: the step contract, clock API and helpers.references/film.md: the hero variant (flows scheduled from a graph, beats with cues, a measured camera).references/brief.md: the shared brief template for helper agents.demo/index.html: a self-contained demo (vanilla) of Fil for Mac making a picture, with a scrubber.